

Last Updated on September 14, 2025
If you’re road-tripping through the American Southwest, there is no way that you’re skipping Arches National Park. This special National Park in Utah is going to be a crucial piece to your southwest or Utah Mighty Five road trip, and if you want to maximize your explorations here, 3 days is the perfect amount of time to see everything this park has to offer!
While there are around 2,000 different Arches in this park and the largest collection of sandstone arches in the entire country, you’ll only be able to explore a handful of them, yet they are some of the most photographed natural rock formations in the WORLD! Arches National Park is a special place. From the second you drive into the park to the day you wave this place goodbye, this park is sure to fill you with awe and leave you craving to exploring the rest of Utah’s iconic National Parks: Canyonlands, Capitol Reef, Zion, and Bryce Canyon.
This Arches National Park itinerary for 3 adventure-filled days is going to take you through the most beautiful and remote parts of the park. These three days highlights include the Delicate Arch, Landscape Arch, Sand Dune Arch, Double Arch, Balanced Rock, and the iconic Devil’s Garden Hike. Eager to get a peek at these trails and hit the road? Let’s go!
This post may contain affiliate links for the products I mentioned, but as always, all opinions are my own. I make a small commission, at no extra cost to you, when you make a purchase or booking through these links. This helps to support this space and keep me blogging, which I am so extremely thankful for.
The Best Time To Visit Arches National Park
THE BEST WEATHER
May – September
FEWER CROWDS
September – April
MOST DAYLIGHT
June – AUGUST
Where To Stay In Arches National Park
+ outside the park in Moab
Devil’s Garden Campground | $25 / Night
If you want to stay in the middle of the action for your Arches itinerary, then the Devil’s Garden Campground is undoubtedly one of the best places to stay. This is a great option if you don’t have an ‘America The Beautiful’ Park Pass and you want to save money on entrance fees. The campground is about 3/4 through the park and is very close to the Devil’s Garden Trail and the Tower Arch Trail, some of the best hikes in the park.
The campsite is established, however, there aren’t any showers or any type of store, so if you’re staying here, make sure you’re stocked up on food for the next couple of days. The biggest perk of staying here is the location, but since it books up fast and is full for the entirety of the summer season, you may want to, or end up staying in Moab.
Reservations (March 1 – October 31)
First Come First Served (November – February)
Slickrock Campground | $30 / Night
This is the campsite that I personally stayed at and I actually really loved this campground. I split the cost between my friend and me, so we were able to get a pool, laundry service, shaded tent sites, a small store, and showers for only $15 each! It’s not the greatest place if you’re solo and on a budget, but if you like to have more amenities while you camp, this is a perfect option! If you have a larger group, you can grab a spot for around $10/night per person!
It’s around a 10-minute drive to Arches National Park, too, so it’s also ideal for anyone planning on doing sunrise hikes!
Book Your Stay
BLM Campgrounds along the Colorado River | $20 / Night
If you want to get away from larger crowds and have the solitude of the Colorado River all to yourself, there are plenty of BLM (Bureau of Land Management) campgrounds along this river right outside Arches. These normally run around $20/night and don’t generally have many amenities, if any. The closest site is 10-minutes away from the park and they slowly get further as you go up the river.
These are great if you want a bit of solitude for your Arches National Park itinerary for the 3-days you’re here and they’re a great budget option outside of the park. I recommend getting to one of these sites early, setting up your things to reserve your spot, and then heading to the park.
First come first served
Recommended Read: The Ultimate Guide To Camping In Arches National Park (COMING SOON)
Big Horn Lodge | ~$1oo / Night
A fantastic lodge experience in Moab is at the Big Horn Lodge. It’s located right in the heart of Moab and is perfect if you want a break from the heat of the desert and have a pool to cool off in. Even if you only book for the pool, it’s worth it with how hot the summer is! The entire lodge has a western/diner type of feel that is perfect if you want to travel back in time to the wild west, enjoy great coffee, and even some wifi if you need it!
The smallest rooms available can also sleep four since it has two queen beds, so this is a great option if you’re traveling with a group on a budget!
Book Your Stay
Moab Under Canvas | ~$200 / Night
If you’re really ballin’ and want a really unique desert camping experience, then Moab Under Canvas is a fantastic place to stay even if it’s only for one night to treat yourself! It’s titled, ‘the gateway to Arches National Park’, and it’s only a 10-minute drive to Arches, like many of the other stays I have mentioned! While it is on the more expensive side, there are a ton of benefits included in the nightly cost that may be perfect for your travel style! The cost includes the tent, breakfast, lunch + dining gratuity, coffee service, all taxes and fees, AND a choice of one of their adventure options: ziplining, private hiking, hummer safaris, white water rafting, jet boat tour, or canyoneering!
Even the smallest tent can sleep four people, so you can even split this cost and have an epic experience for $50!
Book Your Stay
How To Get Around Arches National Park
-
By Car
As developed as Arches National Park is, it does not have any type of shuttle system that will be able to take you around the park. Also, the park is widely spread out over the entire 19-mile scenic drive, so walking isn’t so efficient, either, making the best way to get around the park on your visit is with your own car. Whether that be one you’re bringing from home or rental you’re picking up, you don’t need anything really fancy. All of the roads in the park are well-paved and look practically brand new! The only road that is gravel is the road to get to the Tower Arch Trail, but it is still passable even with your average car. This method of transport will maximize your time spent in the park!
A Map of the Arches national park 3-day itinerary
The Best 3-Day Itinerary For Arches National Park
Overview
Before we dive into this itinerary for Arches National Park, here is a small overview of what you can expect over the next three days.
This itinerary ensures that you hit both the iconic and off-the-beaten-path spots in this park. For day one, you’ll begin your day with a sunrise hike to the Tower Arch, followed by trips to the Salt Valley Overlook, The Fiery Furnace hike/viewpoint, the La Sal Mountains Viewpoint, and then the Park Avenue trail to end the day for sunset. On day two, after coffee and breakfast, you’ll take on the Devil’s Garden Trail! Make sure you take lots of snacks and water for this hike since it’ll take quite a few hours ton complete this loop! This day isn’t as packed so you have the option to add other hikes and viewpoints that interest you if you feel inclined to take them on. In addition to that, you’ll visit the Sand Dune and Broken Arches, as well as Balanced Rock, one of the most iconic formations in Arches after the Delicate Arch! For day three, you’ll start your day by exploring none other than the Delicate Arch (save the best for last!), the Windows Section, Double Arch Trail, and the Garden of Eden Viewpoint!
To make sure you’re safe and fueled during this itinerary, make sure you avoid hiking midday if visiting during the summertime and fueling up properly before and after the longer trails listed in this post!
Arches Itinerary Day 1: Waking Up In Tatooine
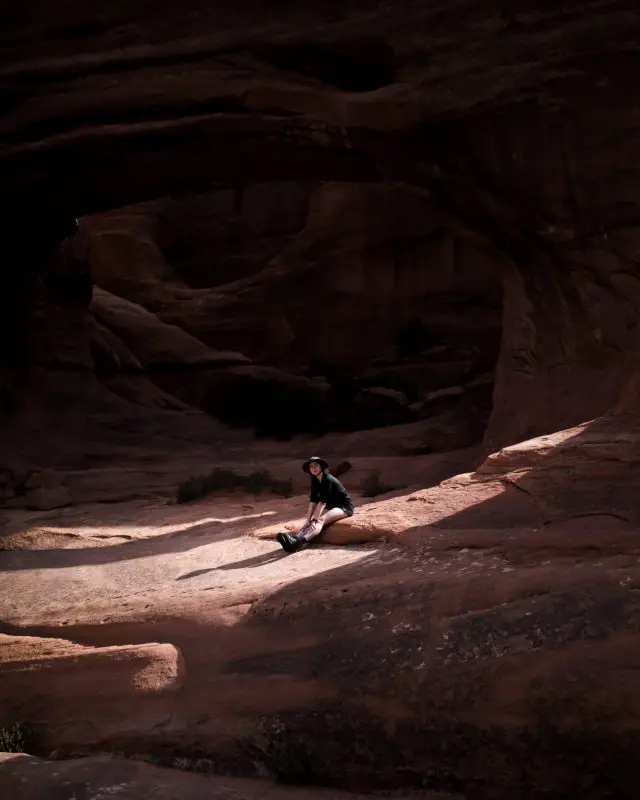
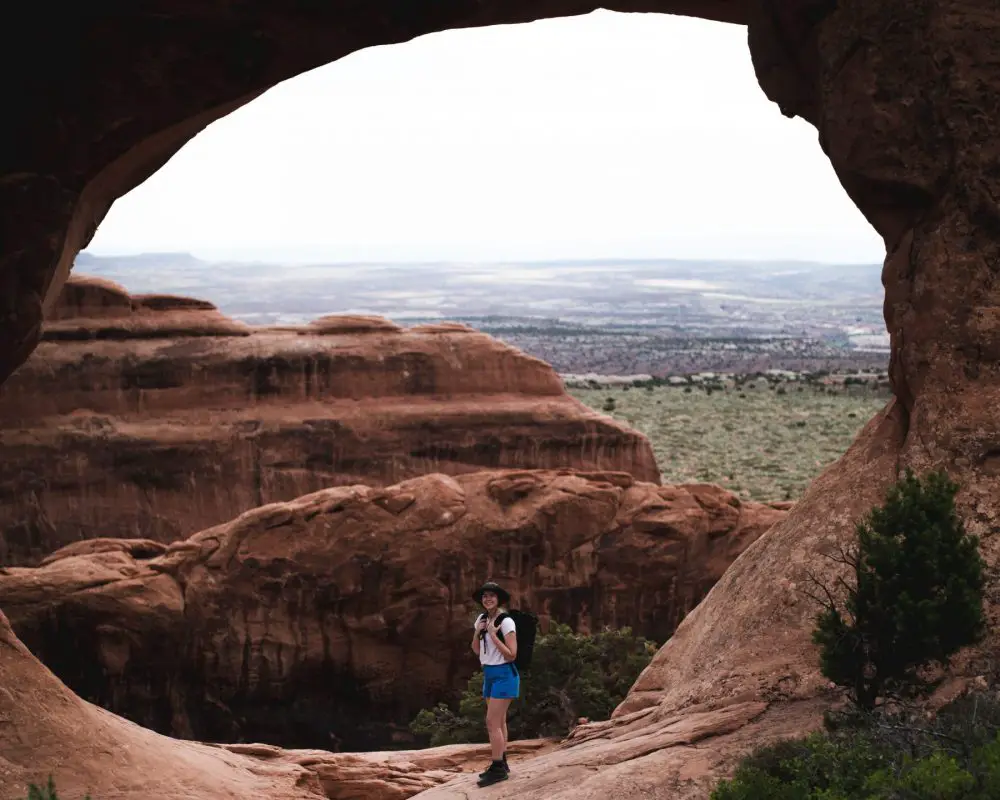
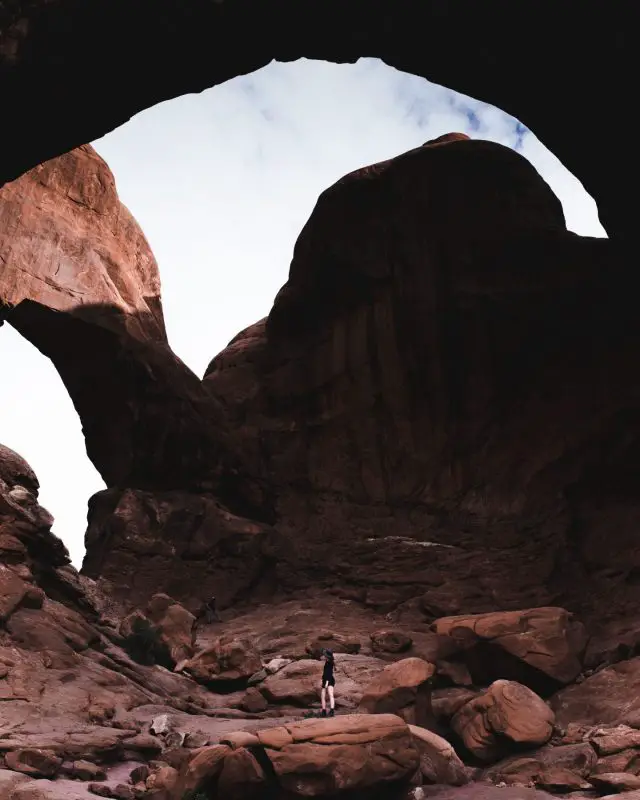
Tower Arch Trail
The first stop of the day is going to be my favorite hike in Arches. If you’re driving into Arches this day, I would make this a sunset hike, but if you’re able to wake up early, sunrise is fantastic as well. I’ve argued this on many occasions that this is the BEST hike in Arches National Park. Not to take away from the pure majesty of the Delicate Arch, but this is a place that NO ONE knows about, which grants it extra brownie points, in my opinion. So you’ll begin your Arches itinerary with a serene and still morning hiking to the Tower Arch. If you’re not a sunrise person, this hike is also best explored at sunset and you can watch a beautiful orange glow over all of Arches National Park. Just make sure you pack your headlamp!
The Tower Arch Trail is around 3.2 miles roundtrip and since it is an out-and-back trail, it’ll take you around 1-1.5 hours to get to the actual arch so keep that in mind on your dusk/dawn hike. You don’t have to worry about crowds on this trail because this bad boy is DESERTED in the best way possible. The road to this trailhead is easily passed up by other highlights in the park, so 99% of people don’t make it out here. To put it in perspective, I hiked this trail in early August, deep into high season, and I only saw two other people here till NOON. Oh yeah, you’re going to love this hike!
I have an entire guide to this trail that you can read here to help you plan more thoroughly!
Salt Valley Overlook
After you hike the Tower Arch Trail, you’ll have a stop at the Salt Valley Overlook before you go and grab some lunch at camp or in Moab. This overlook has a view of the La Sal Mountains in the distance and a quick peek at the hike you’ll be exploring after lunch, the Fiery Furnace! If you want really nice photos here, you’ll likely need some type of telephoto lens to capture the views in the distance. Otherwise, everything is pretty far away. Or if you don’t own a telephoto lens, bring a pair of binoculars!
Fiery Furnace Viewpoint
The next stop on this Arches Itinerary is going to be a good view of the sandstone maze you’re about to enter. The trailhead of the Fiery Furnace is next to this viewpoint, so you can take in the view while you wait for your ranger and other hikers to arrive before you head out!
Fiery Furnace Trail (PERMITS REQUIRED/GUIDED HIKE RECOMMENDED)
Another awesome trail in Arches National Park is the Fiery Furnace Trail.
Before you head onto this trail, you must get a permit to hike this at the Visitor’s Center. Permits are only available on certain dates, so plan accordingly. I HIGHLY recommend going on a guided tour before you attempt this because it’s very easy to get lost. There is no set trail and with plenty of footprints of others in many directions from attempting this and getting lost, it’s way too easy to get yourself turned around. If you’re an experienced hiker and boast loads of confidence, you can get a self-guided permit if you wish.
Permits are easy and not too competitive. You can read about the requirements for Fiery Furnace permits here. It’s an incredible trail in this park and I would prioritize this hike in these 3 days in Arches that you have to work with! I wasn’t able to make this hike myself, so I’m paying this information forward so that you don’t miss it!
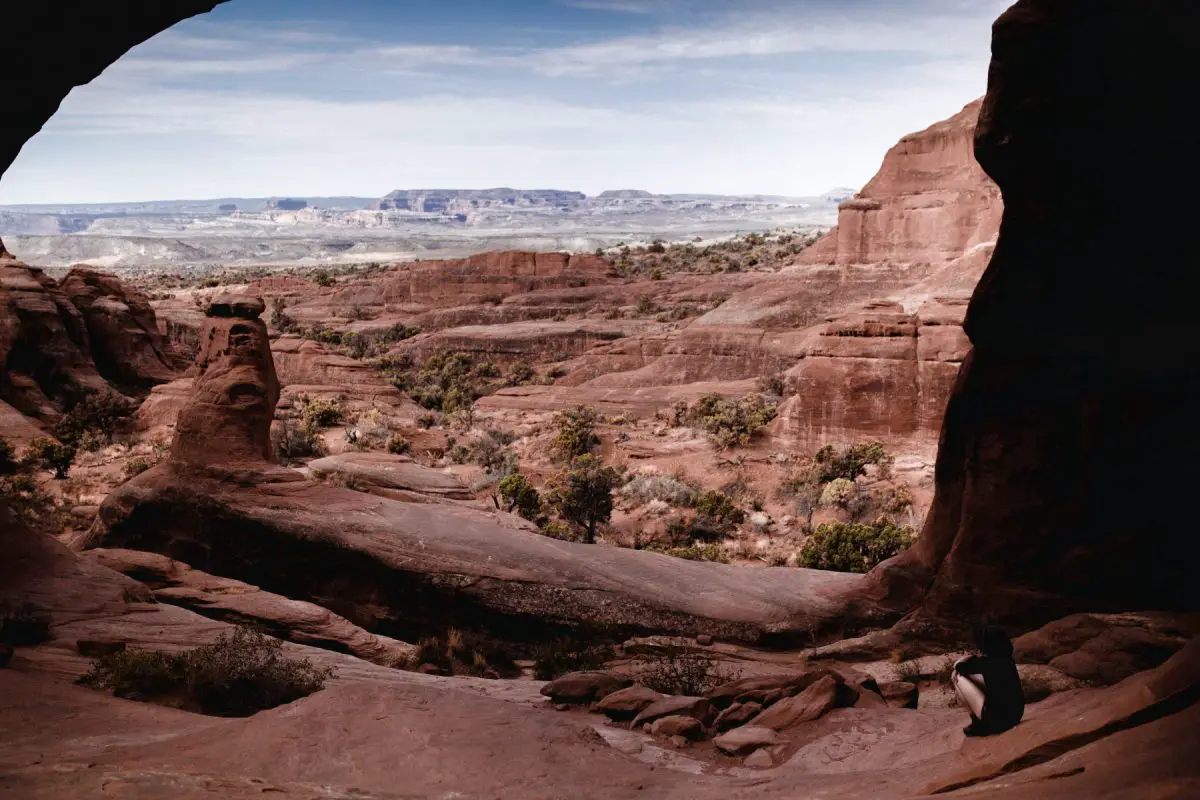
La Sal Mountains Viewpoint
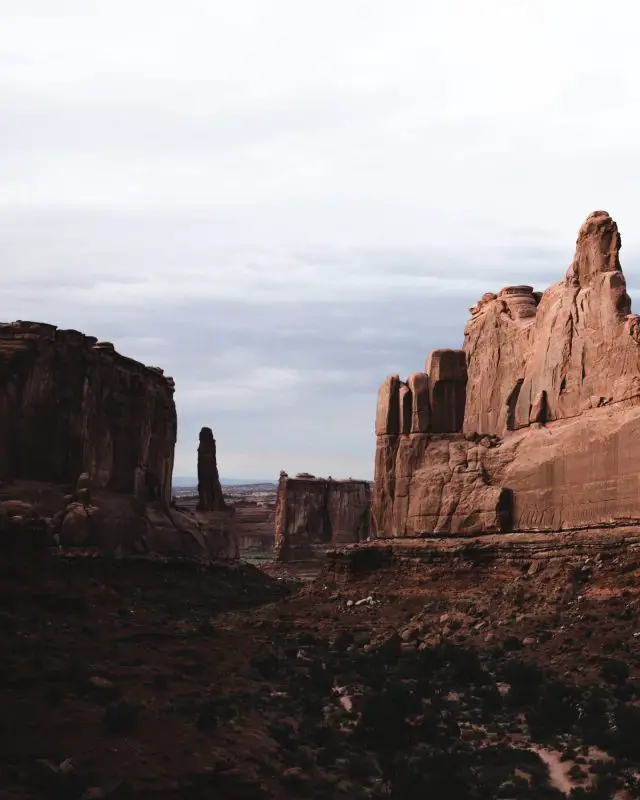
Once you attack the maze of the Fiery Furnace Trail, it’s time to have a stop at the La Sal Mountains Viewpoint. Since you’ll be here in the late afternoon, you may want to stick around here for sunset since the views are beautiful and this is a perfect backdrop for some beautiful photos. To the East, you’ll see the beautiful La Sal Mountains along with three other iconic rock formations: The Three Gossips, Sheep Rock, and the Organ in the Courthouse Towers area! From the horizon, you’ll be able to see glimpses of Balanced Rock and the Windows section that we will be exploring on day 3!
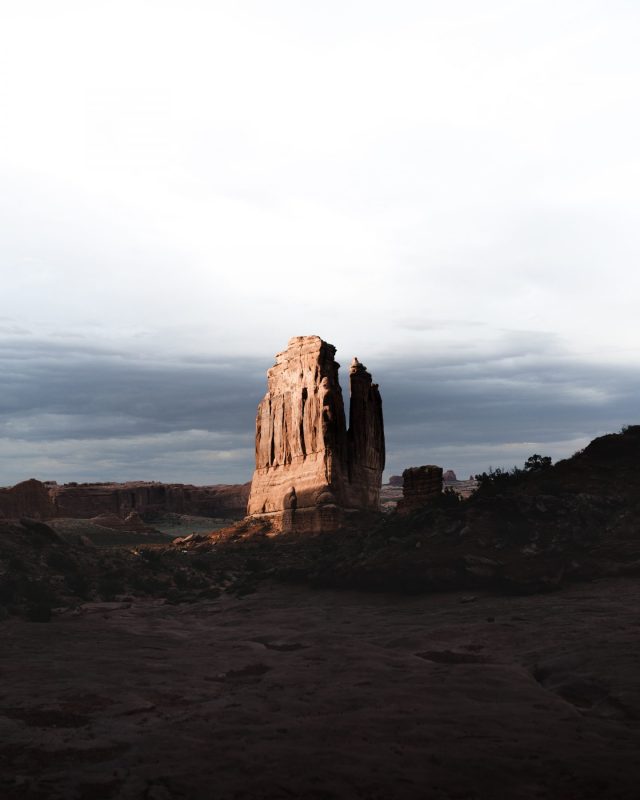
Park Avenue Trail
Quite possibly one of the most underrated hikes, or really more of a leisurely stroll, is the Park Avenue Trail that is about a stone’s throw away from the Arches National Park visitors center. The hike is neither an out and back, or a loop, but it acts kind of like a road, so you begin at the trailhead and it takes you to Courthouse Towers (view the map up top for a better visual), but you can make this out and back if you want since you’re probably driving your own car.
My favorite time to hike this trail is for sunset because there are very few people here this time of day. Plenty of people are out at the Delicate Arch and the Devil’s Garden, so you may have this place to yourself when you go! It’s also an ideal final stop for this day since it’s right next to the Visitor’s Center! The golden rays shine through and around the rock formations and since there isn’t a distinct trail and you feel so small! Follow the cairns through the trail and feel the magic between the rocks!
The trail from one end to the other is about a mile, so you can make it 2 miles total going to the other side and back, 1 mile from one end to the other or you can turn around before then and make it a bit shorter.
Arches Itinerary Day 2: Into The Red Rock
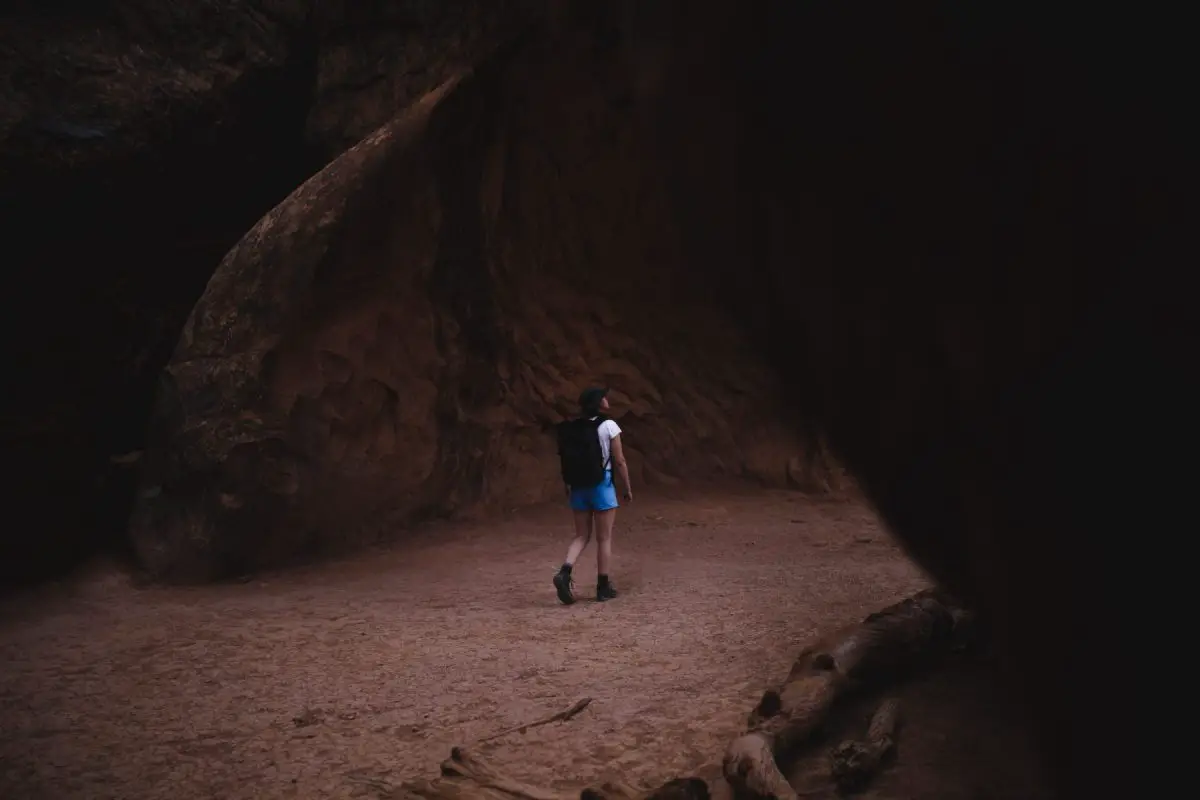
Devil’s Garden + Primitive Trail
The Devil’s Garden Trail is a top competitor for the title of the best hike in Arches National Park. If you choose to hike the entirety of this trail, including the primitive loop, you’ll be able to see a whopping SEVEN different arches! This hike is great if you have limited time in the park since the trail covers a ton of distance and many different types of arches.
I liked this trail since it posed a greater challenge and the views throughout the trail were some of the best and most diverse in the park. Maybe not the very best… but very deserving of its third-place title! If you don’t mind a bit of trail finding, I highly recommend taking the primitive loop as an addition to this hike! ‘Primitive’ means that the trail is not marked with official signs, but cairns that you’ll need to look out for to find your way. For the most part, the cairns were plentiful, but in some areas, you may need to do a little searching to find the next one.
There are technically two ways you can take the primitive loop. You can either hop on before you arrive at the landscape arch, or you can make it all the way up to the Double O Arch and get on from there. From my personal experience, getting on the trail from the Double O Arch is a lot easier than the other way. This route avoids a bit of scrambling and is the most trafficked direction. Not many people take this part of the trail! We had the entire trail to ourselves all morning in August!
Balanced Rock Trail
Ironically, Balanced Rock is one of the most iconic formations in Arches National Park!
This short, flat trail takes you around this massive 3,600-ton rock that appears to be balancing but is defying gravity by resting on a massive slab of mudstone. As erosion breaks away part of the rock underneath the boulder, it will eventually fall away!
This trail is a nice leisurely stroll that takes you right up to the boulder and gives you a feel for just how big this bad boy is! This is a great spot in the park to whip out some sandwiches for lunch, take in the view, and fuel up for your last two hikes of the day!
Add a viewpoint of your choice (optional)
If you take a look at the map at the top of this post, I included some additional viewpoints and hikes that you might want to consider adding to your itinerary if you wish! Take a look at Panorama Point, Petrified Dunes Viewpoint, Upper + Lower Delicate Arch Viewpoints, and the Skyline Arch Trail!
Broken Arch + Sand Dune Arch Combo Trail
The final hike of the day is going to be a small combo loop of the Broken Arch Trail and the Sand Dune Arch Trail. You can start this trail at either trailhead you prefer and make sure you’re here for sunset! The trail to both of these arches is very short and straightforward, which makes it a great place to end the day, especially after all the hiking you did earlier this morning on the Devil’s Garden Trail.
If you only want to see one, it’s should definitely be the Sand Dune Arch! I wasn’t able to see this arch, but I really wish I had! The lighting is perfect during sunset and it’s a stunning spot to take photos!
Arches Itinerary Day 3: The Big Kahuna
Delicate Arch Trail
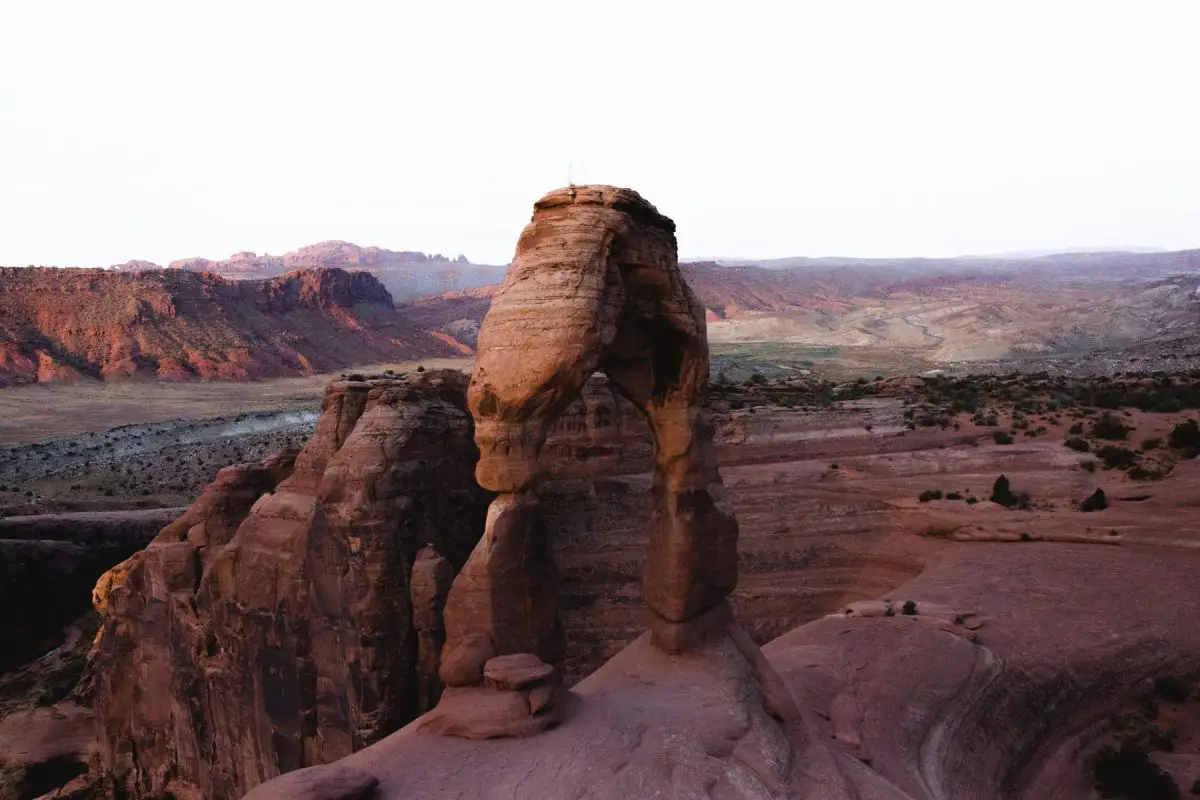
For your final morning on day 3 of this Arches itinerary, it’s time to hike the BIG KAHUNA, the Delicate Arch Trail! This hike is best experienced during sunrise, and it takes around 45 minutes to an hour to arrive at the arch, so make sure you get up extra early this day to make it for sunrise!
After Tower Arch, this was my next favorite hike in Arches, for very obvious reasons, so you’re really going to love this one! The hike is around a moderate difficulty because of the large incline of slickrock about halfway through the trail, but as long as you take it slow, even if you’re not in fantastic shape, this hike is pretty much doable for everyone! Let’s just say it’ll take your breath away!
This is one of the most anticipated sights in Arches National Park, so if you want to see this one your first day here, you can swap this hike with the Tower Arch Trail. Saving the best for last makes it all the more exciting, but do what you gotta do!
Once you get near the arch, there is a small lookout to the right called the Twisted Donut that has a gorgeous, alternative view of the arch that is well worth stopping for. The lighting here is best in the late morning! Visit this before or after arriving at the arch and you’ll enjoy a lot fewer people! If you’d like more information about hiking the Delicate Arch, read my full guide here!
Garden of Eden Viewpoint
After the most memorable morning of your 3 days in Arches, it’s time to stop and wander to the Garden of Eden viewpoint.
This area resembles a bunch of tall rock structures, comparable to Balanced Rock, that pop against the La Sal Mountain backdrop in the distance. This viewpoint is excellent during both sunrise and sunset and a great stop to make after waving goodbye to the Delicate Arch!
Double Arch Trail
After taking on the EPIC Delicate Arch Hike this morning, you’ll venture over to the gems near the entrance of Arches National Park, aptly named “The Windows” section. In this area, there is a very notable hike that you’ll want to take, the Double Arch Trail.
This isn’t necessarily a hike, rather a very leisurely stroll up to this magnificent rock formation. The trail in total is only 0.5 miles, so you can enjoy a snack and the view up to this massive arch. Getting a spot to properly view this arch is pretty competitive during sunset, but this area is absolutely beautiful during this time of day, so it’s well worth it in my opinion. If you rather visit with fewer people, sunrise has the solitude you’re looking for!
One of the most fascinating parts of this specific trail is that you can climb into the arch and get a really pretty view over the park!
After you’re done with this stroll, it’s time to wrap up day 3 of this Arches itinerary by exploring the rest of the windows section!
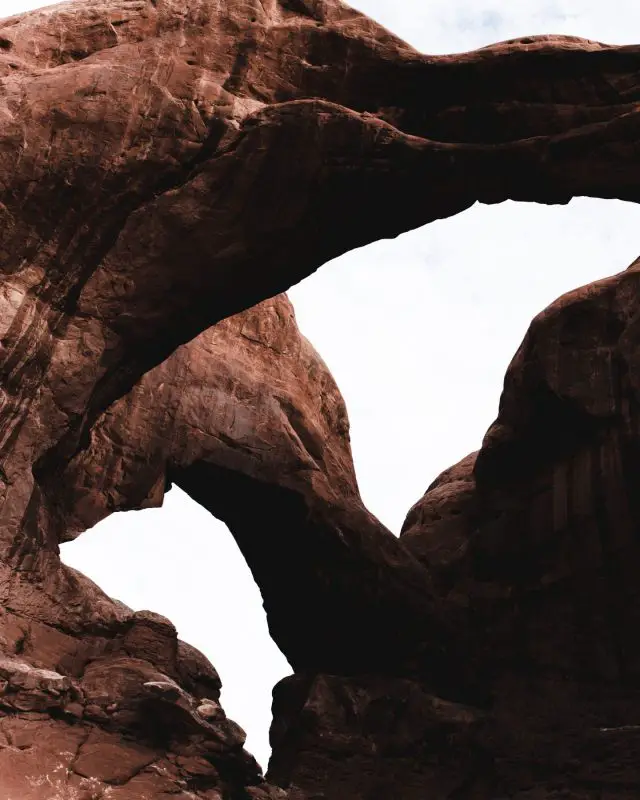
The Windows Section + Primitive Trail
The very last place you’ll visit on your Arches itinerary is none other than the Windows Section! This small area has a handful of beautiful arches that you can hike around during sunset for beautiful colors and views overlooking Arches National Park. From this trail, you’ll be able to see the North Window Arch, the Turret Arch, and the South Window Arch!
This trail is considered to be the beating heart of Arches National Park since there is such a large concentration of arches in a small area. These arches were created by wind-blown sand rather than stream erosion, which makes them all the more magnificent! This is considered one of the most beautiful sections of Arches National Park which makes it the perfect stop before you leave the park!
Recommended Read | 10 Arches National Park Hikes That Will BLOW Your Mind
An Overview of the 3-day Arches National Park Itinerary
-
Arches Itinerary Day 1
Tower Arch Trail
Salt Valley Overlook
Fiery Furnace Viewpoint
Fiery Furnace Trail
La Sal Mountains Viewpoint
Park Avenue Trail
-
Arches Itinerary Day 2
Devil’s Garden + Primitive Trail
Balanced Rock Trail
Broken Arch Trail
Sand Dune Arch
-
Arches Itinerary Day 3
Delicate Arch Trail
Garden of Eden Viewpoint
Double Arch Trail
Windows + Primitive Trail
Only have one day in arches national park? Here’s what you should prioritize:
Delicate Arch (sunrise/sunset)
Double O Arch
Sand Dune Arch
Tower Arch (sunrise/sunset)
Arches Scenic Drive
Devil’s Garden Trail
Essentials For 3 Days In Arches National Park
-
Day Backpack
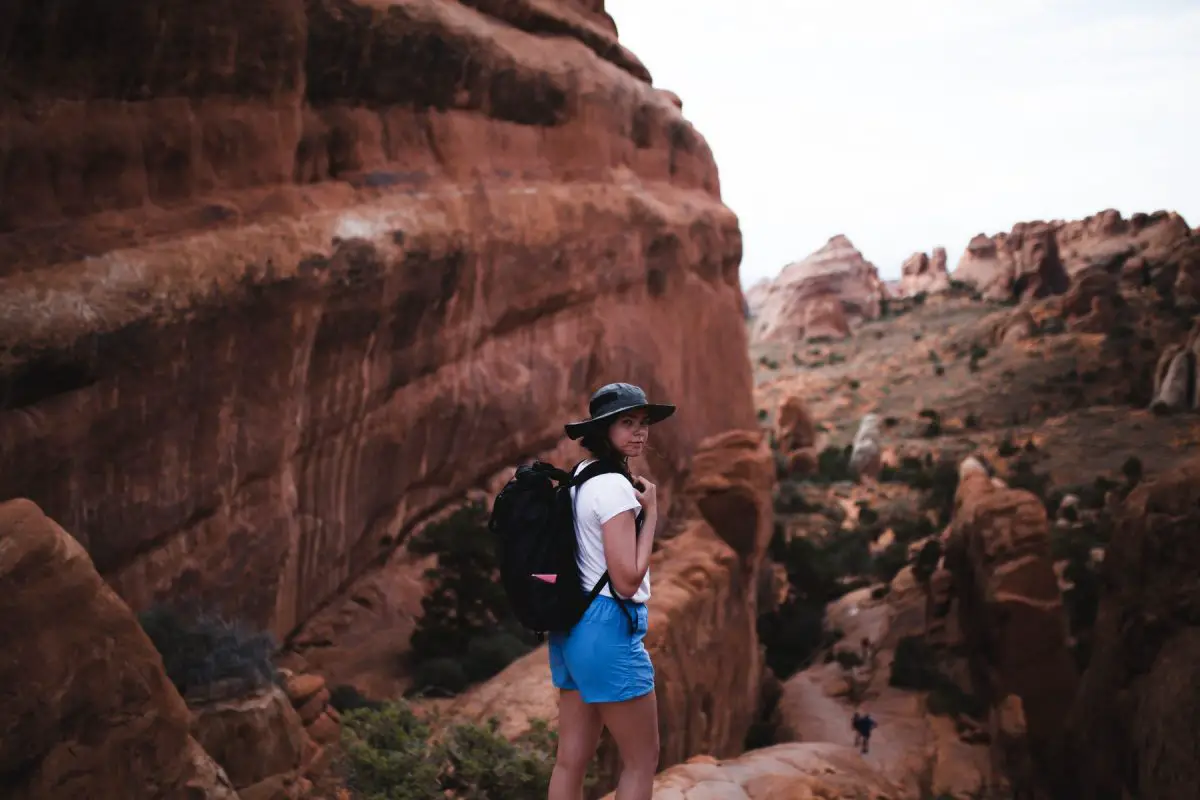
I really don’t like to be carrying a lot of things if I am taking day hikes, so having a day pack where I can toss all these essentials into is, well, essential! If I want something more casual, I always grab for my Fjallraven Kanken backpack since it’s stylish and it is able to hold my camera in it, but if I need all of my photography gear, then you’ll always see me carrying along with my WANDRD pack that is perfect for travel photographers. However, if we’re talking in terms of practicality, I will always recommend day packs from Osprey. It’s my tried and true backpack brand and they will last decades!
-
Reusable Water Bottle + 2L of Water
As soon as you enter Arches National Park, you’re going to spot reminders everywhere to carry lots of water when you hit the trails. If you’ve been following my journey for a little bit, you’ll know that Hydro flasks are my right haaaaaand, they’re my go-to (the Drake reference probably doesn’t carry into text, but if you got it, you got it). My daily bottle is around 1 liter, but that isn’t near enough water for longer hikes, so I recommend carrying at least two with you at all times. It will make your bag heavier, but as you go through the hike and drink water, your bag will slowly get lighter so it’s a win-win. The downside of Hydro flasks is that the weight of them can be a lot in your pack, so a cheaper, lighter option would be these narrow-mouth Nalgenes that are just as good and great if you’re on a budget.
-
Hiking/Sun Hat
The desert is a hot hot HOT place with lots of sunshine, so you want to protect your face from the direct sunlight. There isn’t a lot of shade in Bryce Canyon and the sun will be higher in the sky even on your way back if you choose to hike this super early in the morning, so a proper hat going to keep the sun out of your eyes, especially with this hat that has UV protection and a quick-wicking sweatband. I just got it specifically for my trip to Utah, and I already know I am going to have it for a while. They come in a cool selection of colors, but the grill color is my favorite.
-
Hiking Shorts
So hiking in the desert in the sun is a recipe for the one thing that everyone hates; chafing. Am I right, ladies? Wearing shorts where the seam doesn’t rub against my inner thigh is the MOST essential thing when I take desert hikes and my tried and true shorts for this are the Patagonia Baggies. I have them in two different colors, the black and blue, but I plan on ordering these awesome ones with melons on them and these pretty orange ones. I recommend sizing up in them because the fit of the shorts runs on the smaller side, but they do have a drawstring so you can tighten them however much you need. Also, they have pockets! See them here!
-
Hiking Top
With all the sweating that is going to go down on these during this Bryce Canyon itinerary, you want a top that is going to keep you cool, wick away sweat, and keep you stench-free. I’m currently giving the Patagonia Capilene Cool Daily T-Shirts a shot and so far I am a huge fan of them! They lay very nicely and don’t stick to your body even on the hottest of days! I recommend getting a light color so you can stay cool.
-
Sunscreen
Sunscreen should be the first thing you pack into your bag for trails, trips, and even everyday life. Protecting your skin is so so important and I trust Raw Elements SPF 30 Sunscreen to protect my skin on the trails. Ever since my mom was diagnosed with melanoma years ago, I always make it the first priority to apply sunscreen before I begin hiking. The Raw Elements Plastic-Free Tins keep my skin protected and have prevented sunburns even in the heat of the desert! I love it because it’s biodegradable, reef-safe, broad-spectrum, AND you can buy a tinted tin version for your face so you don’t look like Caspar like when you apply other sunscreens. Raw Elements is my favorite, but you can browse these other awesome zero waste sunscreens to try!
Tips for this Arches National Park 3-Day Itinerary
-
Shift plans/hikes as needed
Three days in Arches National Park is plenty of time to thoroughly explore the entire park. Which means this itinerary is very laid back and flexible for your activities. If you desperately want to see the Delicate Arch on the first day instead of the last, go for it. If you’re too tired to conquer the entirety of the Devil’s Garden, skip the primitive loop. You will see so much on this itinerary that being flexible is very easy!
-
Don’t hike in the midday heat
This is especially true if you’re visiting during the summer months. You’re not going to want to hike midday anyway because the heat is just too brutal. I’ve experienced a handful of summers here in Texas, so I thought I was prepared for what was coming, but I couldn’t have been more wrong. It gets so toasty here so shoot to have your hikes begin before sunrise and end before/around midday. This is a great time to fuel back up and maybe getting a nap in before you venture back out to the park!
-
stay hydrated
Going along with what I mentioned above, you want to make sure you’re drinking plenty of fluids before and during your hike. I recommend trying to drink around a liter of water in the morning before you start sweating so you can wake up your body properly and get that hydration in before the heat sets in. Then from camp, you should bring at least two liters of water with you on longer hikes and at least one for shorter trails.
MORE HELPFUL GUIDES FOR YOUR TRIP TO ARCHES NATIONAL PARK:
– Packing For A Day Hike: 12 Adventure Essentials To Get You Exploring
– The BEST Guide To The Delicate Arch Hike In Arches National Park
– 10 Arches National Park Hikes That Will BLOW Your Mind
– The Ultimate Guide To Camping In Arches National Park
– Tower Arch Trail: The Best Hike In Arches National Park
ADD THESE ARCHES NATIONAL PARK HIKES TO THESE OTHER ROAD TRIP STOPS CLOSE BY:
– The ONLY Utah National Parks Road Trip Itinerary You Need
ZION NATIONAL PARK
– How To Conquer The Narrows Hike In Zion National Park (Complete Guide)
– 2 Days In Zion: The Ultimate Zion National Park 2 Day Itinerary
CAPITOL REEF NATIONAL PARK
– How To Spend One EPIC Day In Capitol Reef National Park
– Hiking The Cassidy Arch Trail In Capitol Reef National Park
BRYCE CANYON NATIONAL PARK
– The Ultimate Guide To Camping In Bryce Canyon National Park
– 10 Jaw-Dropping Bryce Canyon National Park Hikes You CANNOT Miss
– One Day In Bryce Canyon: The Perfect 1-Day Itinerary
CANYONLANDS NATIONAL PARK
– The 10 BEST Hikes In Canyonlands National Park
HAVE YOU BEEN TO THE AMERICAN SOUTHWEST? SHARE WITH ME IN THE COMMENTS BELOW!

DID YOU FIND THIS ARCHES NATIONAL PARK ITINERARY? SAVE IT FOR LATER ON PINTEREST!

You mention in the reusable water bottle section “Bryce Canyon National Park” and I think you mean to say “Arches National Park.” Just a small correction. Love the article.
Thank you for catching this! Got it updated (: