
Last Updated on September 14, 2025
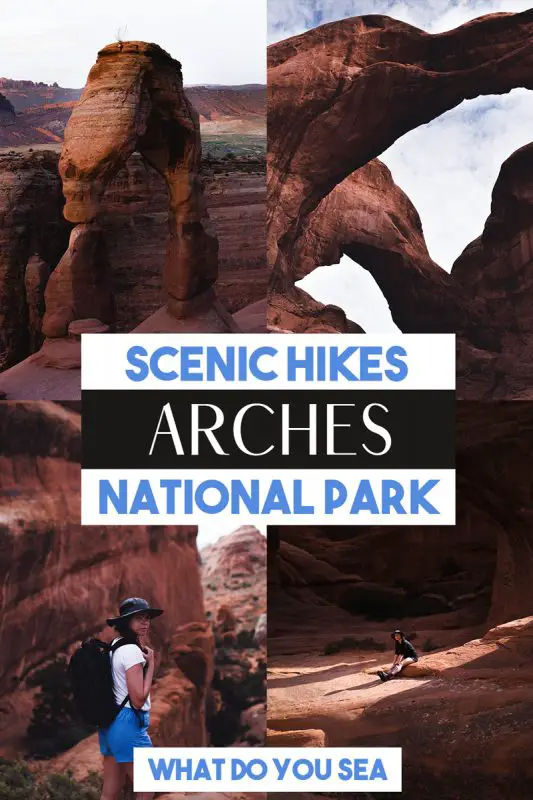
Arches National Park is one of the most sought-after hiking destinations in all of Utah’s National Parks. From the Devil’s Garden Primitive Loop to the Fiery Furnace Trail, these Arches National Park hikes are packed with unique geology and an awe-inspiring arch in front of a backdrop of red and orange hues. This is one of my favorite National Parks that I have visited because it’s small, condensed, and the trails are well-maintained. It’s a perfect stop on a Utah National Park road trip itinerary, or for beginner hikers that are looking for a solid place to start. You can easily see most, if not all, of what these Arches hikes have to offer in 2-3 days, and maybe 4 if you’re keen on seeing absolutely everything and not short on time.
These hikes in Arches will begin short and easy, and gradually increase to longer and more difficult, but really, most of the trails in this park aren’t very long and are fairly moderate, another feature that makes exploring this park seamless even if you don’t have much time. There are over 2,000 natural sandstone arches dotted all over the park, but just a handful are accessible safely on foot! This is the largest concentration of arches in the world, so this hiking experience is one to be remembered before you head off to Canyonlands National Park, Zion National Park, or the rest of the National Parks in Utah! I hope this list of the best hikes in Arches National Park serves you well on your adventure! Let’s dive in!
This post contains affiliate links for the products I mentioned, but as always, all opinions are my own. I make a small commission, at no extra cost to you, when you make a purchase or booking through these links. This helps to support this space and keep me blogging, which I am so extremely thankful for.
What To Pack for Hiking In Arches National Park
– SUN PROTECTION | A lot of these Arches hikes are exposed, so you’ll need chapstick with SPF, a hat, and sunscreen.
– FIRST AID KID | Large or small accidents, you want to be covered. This lightweight first aid kit fits nicely in my bag and has everything I need.
– PROPER SOCKS | Avoid cotton at all costs to prevent blisters. These are my favorite!
– GPS/NAVIGATION TOOL | This is crucial to keep you from getting lost. GAIA, All Trails, and Hiking Project are great apps to consider.
– WATER/SNACKS | Pack plenty of food and snacks for the day, as well as a 2.5L hydration bladder or equivalent in water bottles. Consider a lightweight water filter for the longer trails.
– LIGHTWEIGHT SHORTS | Try to avoid cotton as much as possible. I always wear these shorts no matter what trail I am on.
– LIGHTWEIGHT HIKING TOP | You’ll want something that wicks away sweat and keeps you cool. This is the perfect top.
CLICK BELOW FOR THE COMPLETE LIST


Sand Dune Arch to Broken Arch Trail
The Sand Dune Arch to Broken Arch Trail is one of the easiest hikes in Arches National Park but doesn’t receive near enough attention as other popular arches like the Double Arch or even Park Avenue. This is the full loop of the Sand Dune to Broken Arch Loop Trail, but you can do smaller out and back routes to see Broken Arch, Tapestry Arch, or Sand Dune Arch. This trail has very little elevation gain, so it’s a nice stroll to each of these arches. The trail is marked in most areas, but keep an eye out for the cairns to point you in the right direction. Once the late morning hits, this trail can get a little busy but nothing too crazy, so I suggest going around sunrise or sunset for the best lighting, to avoid people, and for the cooler temperatures since there isn’t much shade here.
This trail is a few of the park rangers’ favorites for its diverse scenery and the variety of arches you’ll see in just short of three miles! This trail does have a little bit of rock scrambling, but nothing technical or dangerous to reach one of the arches. You can start this trail at the Sand Dune Arch Trailhead for the short, 0.3-mile version of this trail, or you can do the full loop beginning at the Devil’s Garden Campground as I have listed here. Sand Dune should be one of the must-see Arches hikes during your trip here!
DISTANCE | 2.8 Miles
DIFFICULTY | Moderate
TYPE OF TRAIL | Out & Back or Loop
ELEVATION GAIN | 321 Feet
TRAILHEAD LOCATION | 38.77449224307553, -109.5866827428406
TRAIL GUIDE | LINK

Balanced Rock Trail
The Balanced Rock Trail is a partially paved, 0.3-mile trail that leads you to see a 3600-ton boulder balancing on top of a sandstone spire. The rock isn’t actually ‘balancing‘ since it’s all attached to the sandstone rock it’s resting on, but it’s cool, nevertheless, and won’t be here forever. There used to be a smaller, similar formation next to Balanced Rock, but it fell in the winter of 1975-1976. The rock itself is Entrada Sandstone and the pedestal that it sits on is Carmel Formation, so it erodes a lot faster and causes formations like these to break away over time. The arches and other rock formations around the park used to be buried by about a mile of rock, so we’re lucky to be able to see all of these in our lifetime! The Entrada Sandstone was deposited here around the time of the Jurassic Period, somewhere in the ballpark of 180-140 million years ago!
The trail gives you a complete 360-degree view of Balanced Rock. Once you get to the end of the paved part, you can look out onto the La Sal Mountains and the Windows Section near the entrance of the park. You’ll be surprised at how close you can get to the formation, and how big it actually is in real life! Standing next to the rock, you’re looking up at almost 130 feet! This is one of the easiest and most accessible hikes in Arches National Park.
DISTANCE | 0.3 Miles
DIFFICULTY | Easy
TYPE OF TRAIL | Loop
ELEVATION GAIN | 55 Feet
TRAILHEAD LOCATION | 38.70177270723867, -109.56591761396906
TRAIL GUIDE | LINK
Double Arch Trail
The Double Arch Trail is closer to a leisurely walk than it is a hike, so if you’ve done a strenuous hike in the morning, then this is a great arch to visit for a little bit of relaxing in the afternoon or closer to sunset. However, Double Arch is best hiked in the morning before the masses arrive. Sunset is a beautiful time as well but there are going to be a ton of people depending on what season you visit, so I recommend heading out for those golden, early mornings rays to beat everyone else out there. If you arrive here later, parking becomes an issue and you likely won’t get a spot. The Double Arch Trailhead is near the Windows Section of Arches National Park, so you can walk to the other section once you’ve finished up here and kill two birds with one stone.
The Double Arch is the tallest and second longest arch in the park, standing at over 100-feet high, you’ll feel tiny standing under these two arches. You can see the arch from the trailhead, but you must go all the way out there to truly experience it. The trail is flat and sandy the whole way through and once you arrive, you can climb up and into the arches for better views and photos. The National Park Service, NPS, has regulated against climbing on arches with an opening of greater than 3-feet, but you’ll see a lot of people not abiding by this rule, so use your best judgment. On your way, keep an eye out for these other popular formations along the trail: Elephant Butte, Cove Arch, Ribbon Arch, and the Parade of Elephants!
DISTANCE | 0.5 Miles
DIFFICULTY | Easy
TYPE OF TRAIL | Out & Back
ELEVATION GAIN | 32 Feet
TRAILHEAD LOCATION | 38.68837634988041, -109.53840808830594
TRAIL GUIDE | LINK
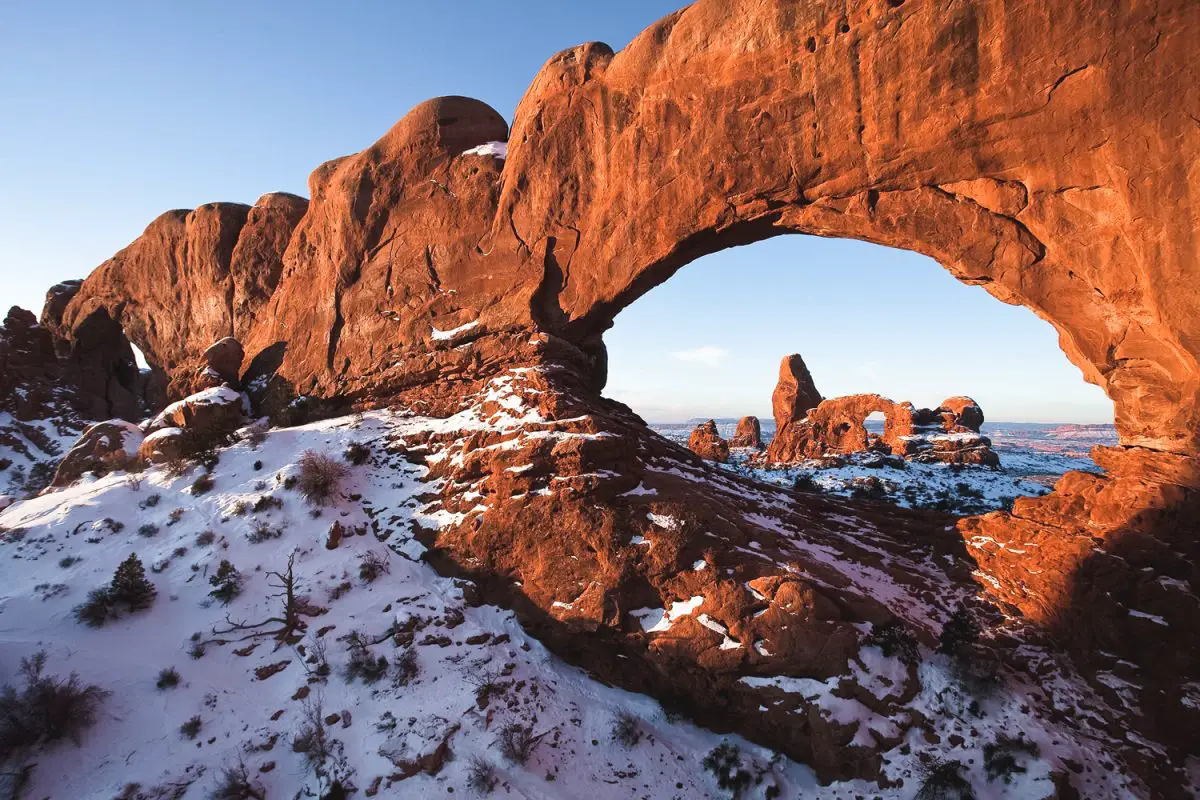
Windows Loop & Turret Arch Trail
The Windows Loop & Turret Arch Trail is another one of the most popular Arches National Park hikes. This section is right next to the Double Arch Trail, so after you’ve finished up at those arches, you can walk across the parking area to access this area and see three different arches: Turret Arch, North Window, and the South Window. If you’re only in Arches for a day or two and want to cram a lot in a short amount of time, this area of the park, and the Devil’s Garden Trail, are your best bets. This trail is extremely accessible and popular, so try and get there early in the morning so that you can grab a parking space. This is one of the first things you see when you get into the park, so it fills and stays filled, for a majority of the day.
In terms of tackling the trail, you have a few different options depending on what you’re feeling. You can do an out-and-back of all three arches for a shorter hike, or you can see all the arches, then continue past the South Window to complete the primitive loop around the area. Few people go out here, so you can lose some crowds and get some unobstructed views of the area, which I always recommend. As always on a primitive trail, watch for the cairns for guidance on where to go. It’s straightforward so you have no likelihood of getting lost. Don’t let the title steer you away and have fun!
DISTANCE | 1.2 Miles
DIFFICULTY | Easy
TYPE OF TRAIL | Out & Back or Loop
ELEVATION GAIN | 154 Feet
TRAILHEAD LOCATION | 38.68716561590462, -109.53672957196154
TRAIL GUIDE | LINK
Park Avenue Trail
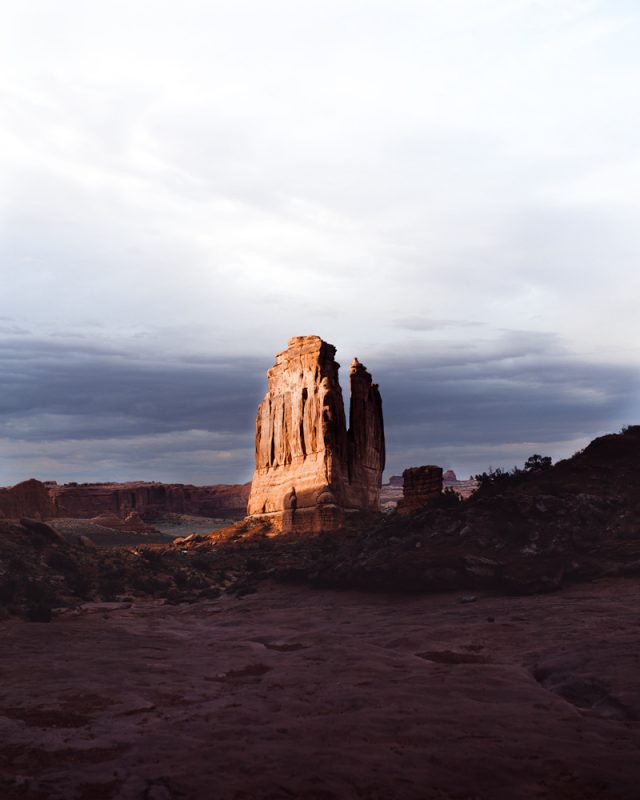
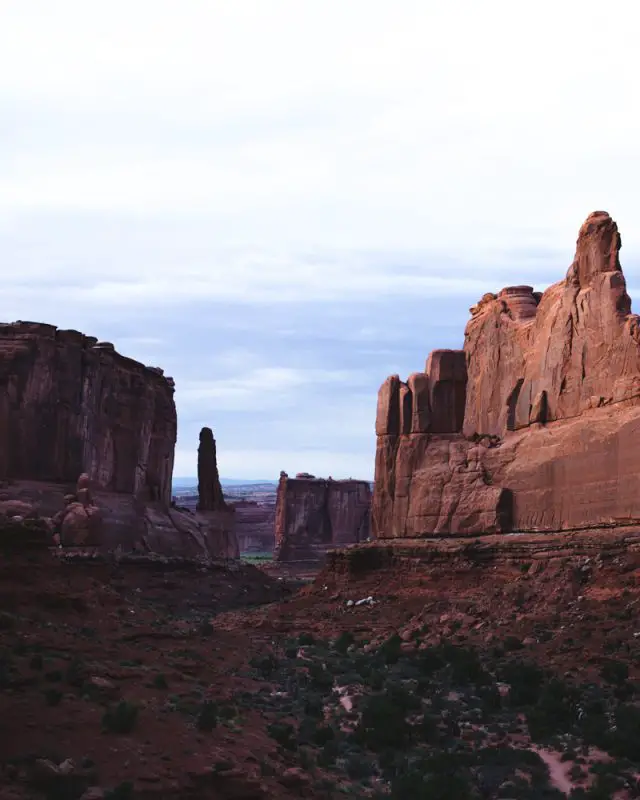
One of the best hikes in Arches National Park is a sunset stroll on the Park Avenue Trail. In my opinion, this hike is best explored at sunset for a few reasons: ample shade, few to zero crowds, and the dreamy nearby views! On this hike, you’ll be able to spot Courthouse Towers, Three Gossips, The Organ, and the Tower of Babel, so this short and sweet trail gives you tons of things to see immediately once you pass the Visitor’s Center. Sunset brings the entire trail into the cool shade and illuminates all the towering rock features in beautiful golden light. This time of day, most people are out seeing Delicate Arch and other “more iconic things” for sunset, so this trail stays relatively empty for sunset which is really cool because you’ll feel like you’re in the middle of the desert with zero people around.
The Park Avenue Trail can be hiked in two different ways. Starting at the Park Avenue Trailhead, you can hike in as far as you’d like, then turn around back to the same and go back to the Park Avenue parking area, or you can hike to the Courthouse Towers Viewpoint. If you have two cars with you, the latter is a solid option to see the entire trail, otherwise, you’ll have to either walk or find transport back to the Park Avenue Trailhead to get your car. The hike goes through the walls of this canyon, but follow the cairns to stay on the better-worn path. This is one of my favorite areas and Arches National Park hikes for sunset!
DISTANCE | 2.0 Miles
DIFFICULTY | Easy
TYPE OF TRAIL | Out & Back or A-to-B
ELEVATION GAIN | 298 Feet
TRAILHEAD LOCATION | 38.62459719768697, -109.59970077296359
TRAIL GUIDE | LINK


ALL TRAILS APP
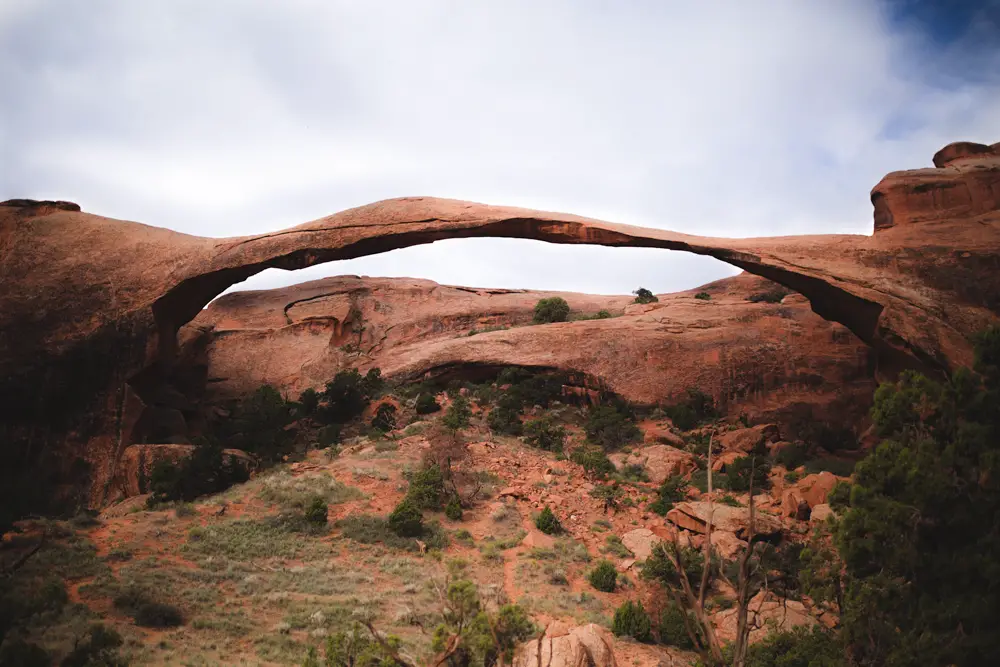
Landscape Arch Trail
After the Delicate Arch Trail, the other most famous Arches National Park hike is the Landscape Arch Trail. Landscape Arch is the longest arch in the WORLD, even after a car-sized piece of rock fell from it back in 1991. Ever since the rockfall from this arch and the collapse of the Wall Arch, you’re not permitted to stand underneath this one, but it’s easily admired from the trail. You can access this trail on the Devil’s Garden Trail beginning at the Devil’s Garden Trailhead. I consider it more of a leisurely stroll than a “hike“. You don’t need to take any detours off of the main trail to see it and this is the normal turning around spot for most taking this trail, so once you pass this, you lose most of the crowds. At any rate, this area of Arches National Park is a favorite among hikers and park rangers for its diverse scenery, so if you’re looking for a very scenic hike that isn’t very difficult then this is a great one. It’s even more scenic if you do the full loop around the Devil’s Garden.
On the way to the Landscape Arch, there are two detours you can take to see two other arches: Pine Tree Arch and Tunnel Arch. These will only add around a 1/2 mile onto your total trail mileage, so if you want to squeeze in a couple of extra sights in addition to the Landscape Arch, then these are perfect for some extra eye candy!
DISTANCE | 1.6 Miles
DIFFICULTY | Easy
TYPE OF TRAIL | Out & Back
ELEVATION GAIN | 259 Feet
TRAILHEAD LOCATION | 38.782945200743704, -109.59489792359541
TRAIL GUIDE | LINK
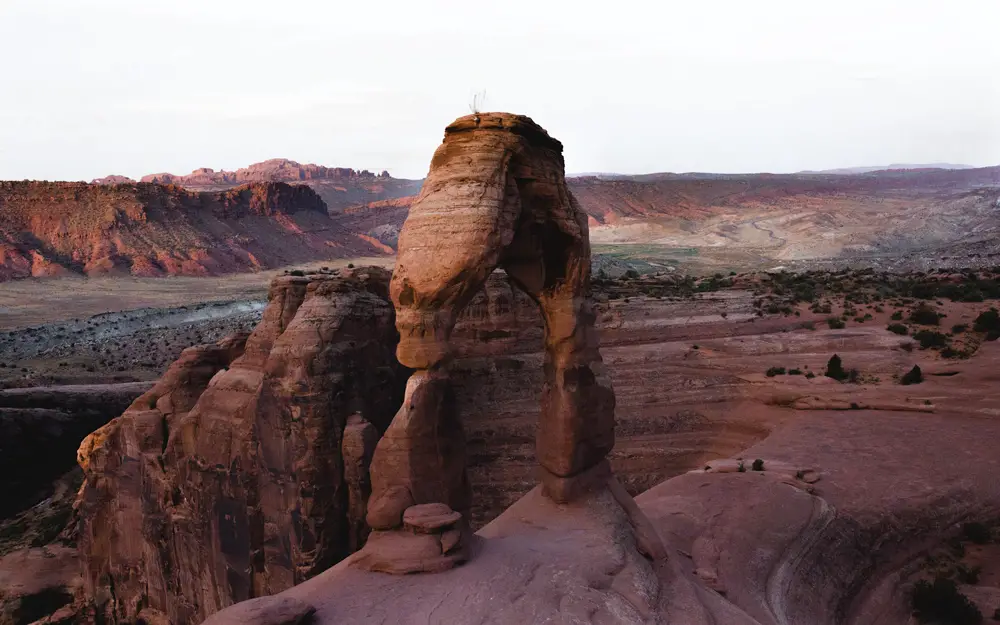
Delicate Arch Trail
The Delicate Arch Trail, for most hikers, is the best hike in Arches National Park, but I am saving that title for a special hike, further down this list… Delicate Arch has everything you want in a hike: challenge, views, and a huge reward at the end. The light opening inside the arch is 46-feet high and 32-feet wide, making it the largest free-standing arch in the park. Seriously this thing is a lot bigger than you think it’s going to be. Surrounding the arch is this large circular bowl/amphitheater-looking formation that will blow your mind when you see it. This whole formation is on the side of an extremely large cliff and the wonder of how it was formed will make wow you just as much as the arch did. If you’re in Arches National Park for more than one day, I suggest saving this hike as the “best for last”. It made it all the more special for my friend and me. Sunrise is the best for the fewest crowds and so you can grab a parking spot. If you’re visiting in the low or shoulder seasons, sunrise or sunset are both perfect since they’ll have the best light.
This arch wasn’t always considered “delicate“. Over time, this arch has been named “Cowboy’s Chaps“, “Old Maid’s Bloomers“, and “Salt Wash Arch“. The popular name today wasn’t coined until a 1934 Arches National Monument Scientific Expedition where they described the arch as “the most delicately chiseled arch in the entire park”.
The trail can be fairly difficult and sometimes dangerous in bad weather as the rocks can get very slippery, so make sure there is a clear forecast before you set out. The beginning of the trail is marked well, but as you get further into it, it’ll be marked with white arrows etched on rocks and nearby cairns, so keep an eye out for those on your way up. The last 1/4 of the hike includes hiking up a steep incline of slick rock, but as long as you take it slow you’ll be fine. A bit before the trail opens up to the Delicate Arch, there is a small area on the right where you can look through the Twisted Donut Arch and look at the Delicate Arch and it’s a really good spot for photography.
If you want to see the arch but don’t want to make the trek, you can drive to the Lower Delicate Arch Viewpoint and hike to the Upper Delicate Arch Viewpoint to see the arch from the cliffside, further away. The hike is the better option, but if you physically cannot do the hike, these are great alternatives.
DISTANCE | 3.0 Miles
DIFFICULTY | Moderate
TYPE OF TRAIL | Out & Back
ELEVATION GAIN | 613 Feet
TRAILHEAD LOCATION | 38.735715221875, -109.52053514102252
TRAIL GUIDE | LINK
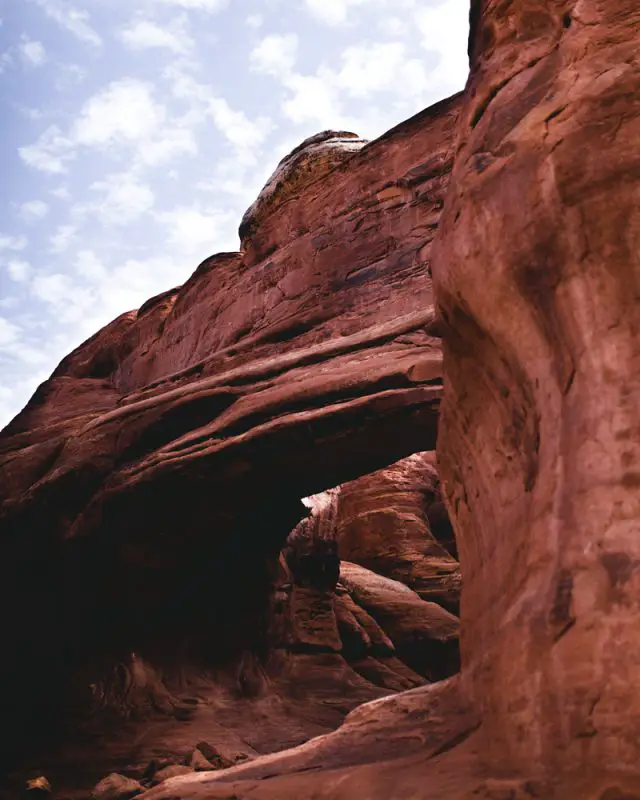
Ring Arch Trail
The Ring Arch Trail is one of the newer hikes in Arches National Park which means few venture onto it, it isn’t well-marked, and the view at the end is immaculate. This hike isn’t posted on any of the maps in Arches, so you really only hear about this trail through word of mouth. If you go on this trail, you’ll need a hiking app to help you stay on the right path since there are many footsteps and paths from other hikers backtracking and going the wrong way. The trail starts at Courthouse Wash and you follow a horse trail for around the first quarter of the hike, then you’ll cross the wash and need to keep the map handy.
Ring Arch spans 63-feet across and 39-feet tall, over a large pothole-shaped bowl. It’s rarely visited, so you’ll likely have it all to yourself once you arrive. It is best explored in the morning for the best light and your best bet at avoiding other people. One of the most important things to know before you go out on this trail is that there are dozens of small cryptobiotic soil crust patches along the route to the arch. These are very fragile ecosystems that need 5-10 years of undisturbed growth before they can be recognized again as dark sponge-like soil patches. One step can do a lot of damage, so stay on the trail as best as possible, walk on the slick rock, wash bottoms, and keep your map handy!
DISTANCE | 3.3 Miles
DIFFICULTY | Easy
TYPE OF TRAIL | Out & Back
ELEVATION GAIN | 200 Feet
TRAILHEAD LOCATION | 38.64914747280968, -109.59834903293869
TRAIL GUIDE | LINK

Tower Arch Trail
Driving down Salt Valley Road keep an eye out for a mysterious gravel road that will lead you to an unexplored desert dreamland, none other than the Tower Arch Trail. THIS trail, in my opinion, is the best hike in Arches National Park. The first reason why this trail is unlike the rest is the fact that nobody goes here. The road down to it looks like it’s somewhere you’re not supposed to go, and it’s filled with wash boarding the whole way, so most people avoid it, but for those that know, get to experience a desert dreamland. It’s also near the Klondike Bluffs area, the most remote area of Arches National Park. This entire trail is primitive, so follow the cairns to lead you in the right direction. Tower Arch is best hiked for sunrise or sunset for cooler temperatures. If you’re going for sunset, make sure you bring your headlamp to help you find the cairns.
One of my favorite things about this trail is that the scenery changes every hundred or so feet, so you’re never looking or experiencing the same thing twice. Many people talk about traveling Utah and it making them feel like they’re on another planet, but this is the one trail that truly made me feel that way. You walk on smooth, vibrant orange sand while looking up at massive boulders placed along the trail. Near the end, you climb up and over boulders to access the arch in the very back corner of this massive rock formation. I actually felt like I was in a scene from Star Wars while on this hike. Since there likely won’t be many people sharing this trail with you, you’ll feel like you discovered Tower Arch as something brand new. To this day this is one of my favorite trails that I’ve ever done! You cannot miss this Arches hike!
DISTANCE | 3.4 Miles
DIFFICULTY | Moderate
TYPE OF TRAIL | Out & Back
ELEVATION GAIN | 600 Feet
TRAILHEAD LOCATION | 38.79255743819111, -109.67507967296021
TRAIL GUIDE | LINK
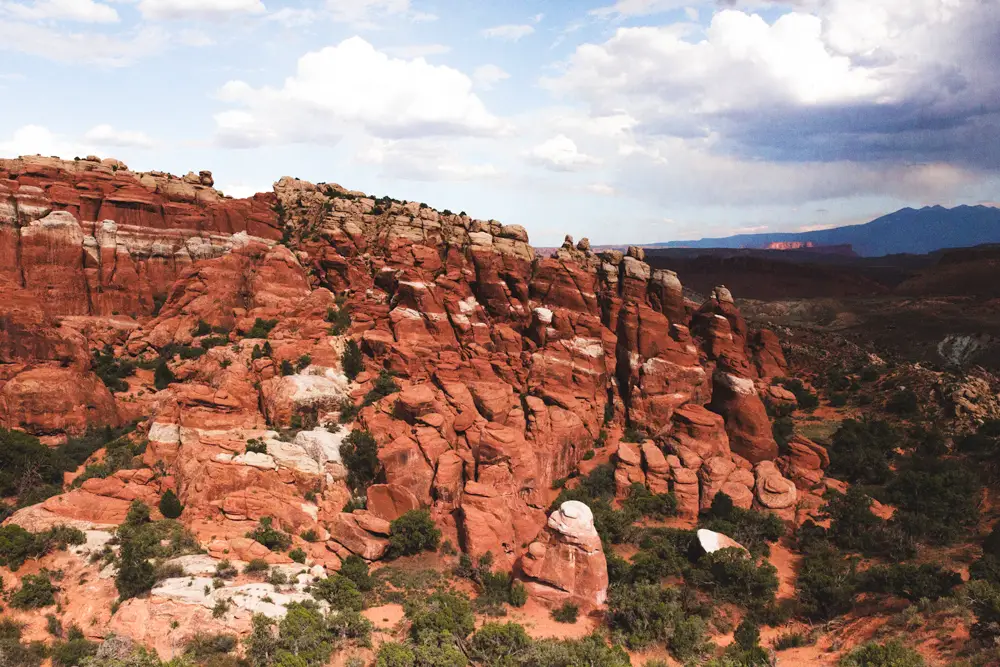
Fiery Furnace Trail
The Fiery Furnace Trail takes you through the towering sandstone formations pictured above and it’s one of the most unique and adventurous Arches National Park hikes! The trail is physically demanding since you walk and climb on irregular sandstone, along narrow ledges and drop-offs, and squeeze through and jump over gaps in the rocks. Experienced or inexperienced, I recommend going on a ranger-led hike if it’s your first time hiking through the Fiery Furnace. There isn’t an established trail and that has led to a lot of people getting lost and/or turned around in this maze because of all the different pathways made in the sand from others trying to find the right way. Along this trail, you’ll also be able to see the Surprise Arch a little over a mile into the trail. This is the perfect hike for those that want to spice up their trip to Arches National Park and go on an adventure.
Permits are required to hike this trail and are only available on certain days, so visit recreation.gov to reserve your permit. Reservations open up 6 months to 4 days before you plan on hiking this trail. If you do end up booking this hike, make sure you show up go to the visitor’s center information desk at least one hour before you are heading out on the hike to check-in. You are able to get a permit to hike the Fiery Furnace on your own, however, it’s REALLY easy to get lost in this labyrinth. Be smart about your decision, whatever it may be. If you have decided to hike without a ranger, read more about permit requirements here.
DISTANCE | 1.7+ Miles
DIFFICULTY | Moderate
TYPE OF TRAIL | Out & Back
ELEVATION GAIN | 436 Feet
TRAILHEAD LOCATION | 38.742921289731136, -109.5658888091359
TRAIL GUIDE | LINK
PERMITS | Yes

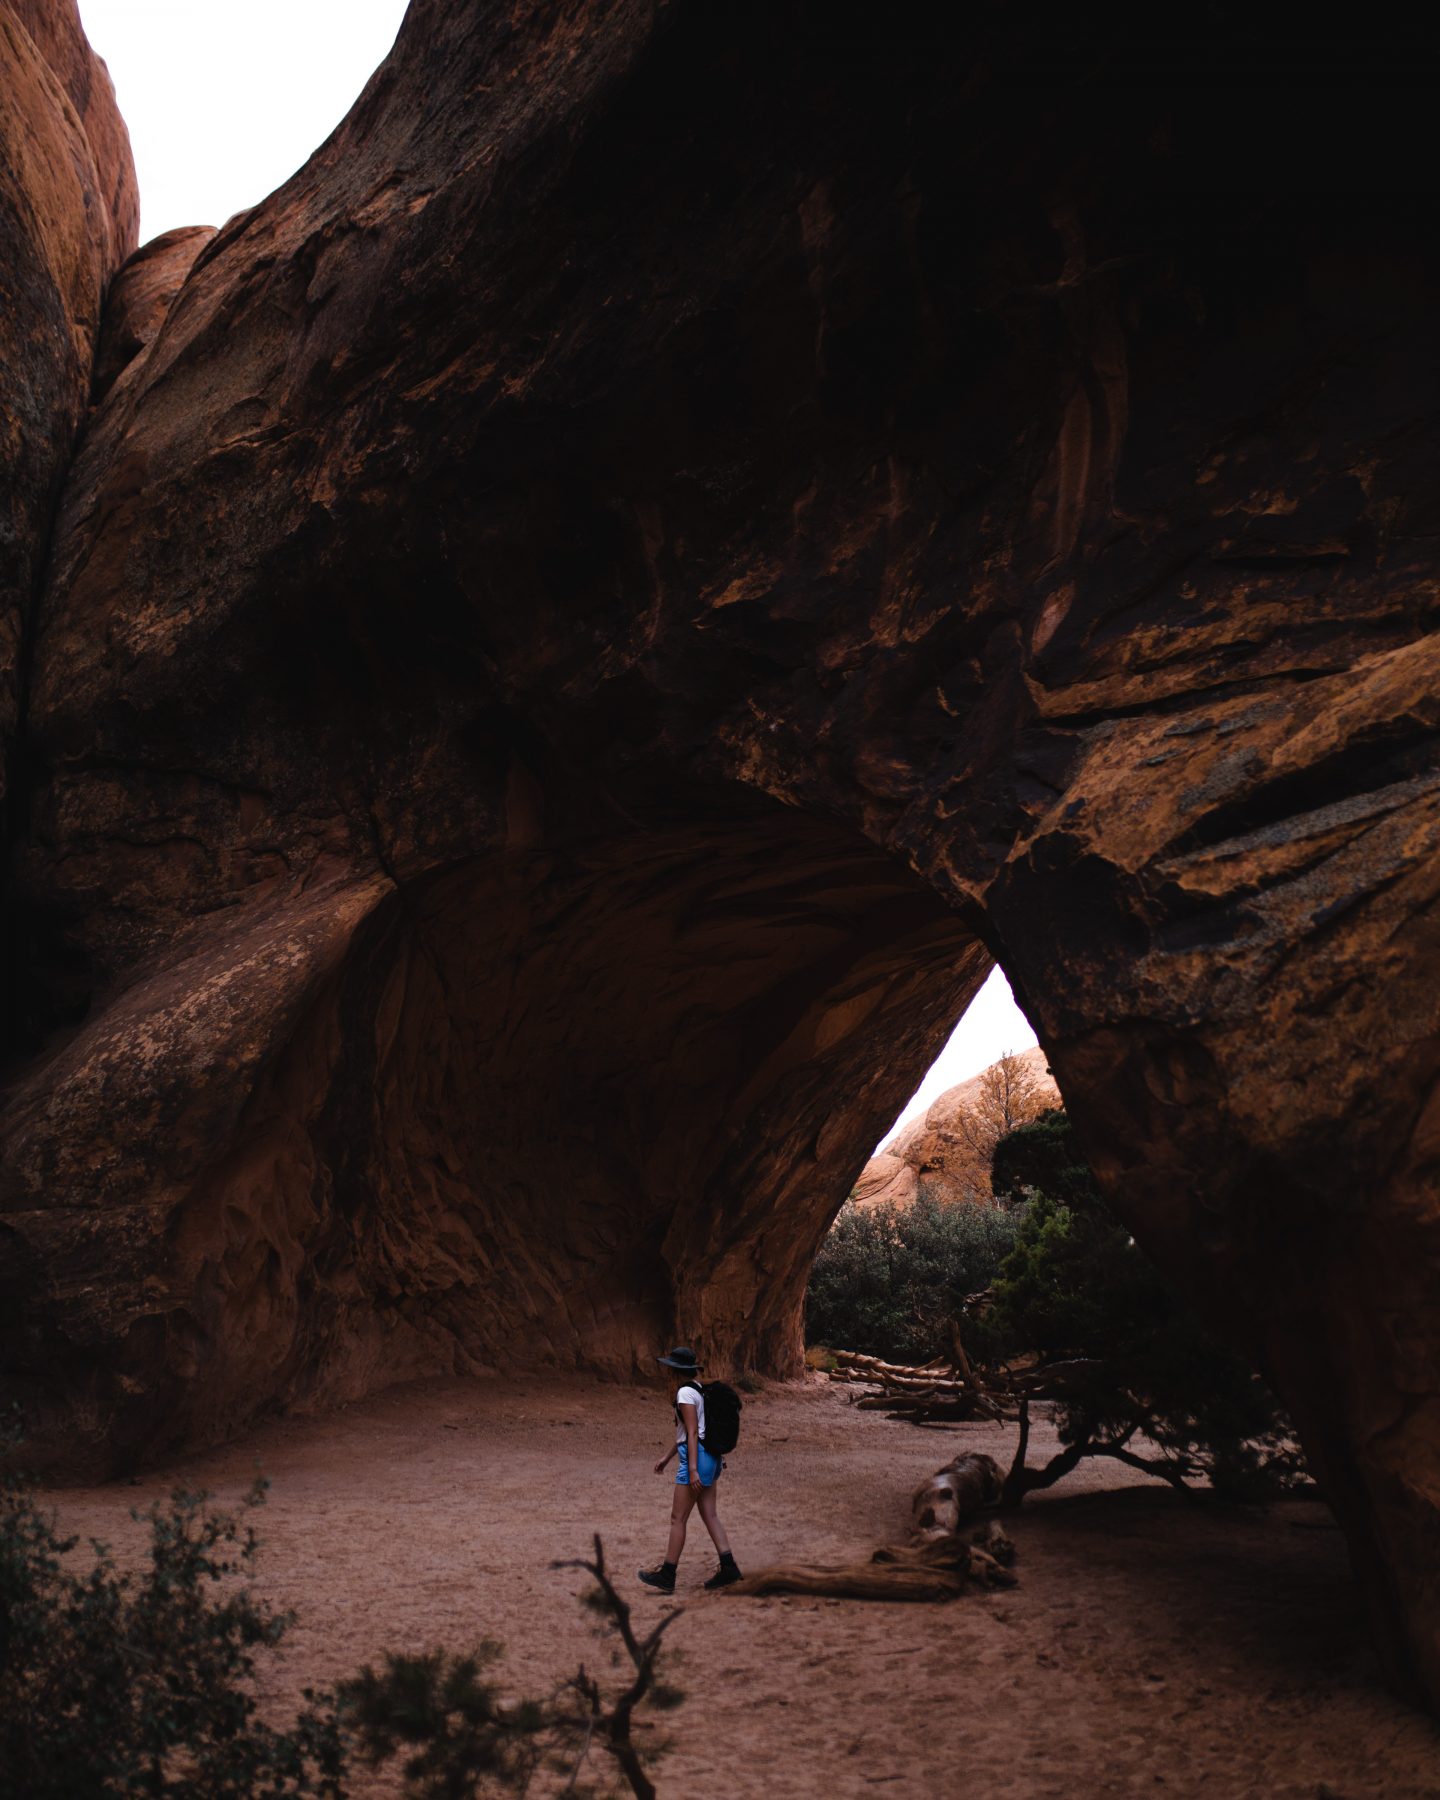
Devils Garden Trail (+ Primitive Loop)
If you’re looking to see a TON of arches all in one go, the Devil’s Garden Trail is a diverse hike that you can take to seven different arches inside the park: Tunnel Arch, Pine Tree Arch, Partition Arch, Navajo Arch, Landscape Arch, Double O Arch, Dark Angel, and Private Arch. Most hikers only make it up to the Landscape Arch, and then they head back to the parking lot, 1.9 miles roundtrip, but I recommend at least making it out to Navajo Arch and Partition Arch. These are the two most beautiful arches on the trail and they’re just a little ways past the landscape arch so you’re not adding much more time to continue forward and see these. What I enjoy most about this trail is that you can make it as short or long as you’d like, so you can easily spend an entire morning out here, or if you’re pressed on time, do a short out and back version.
If you want a more challenging hike, consider tackling the Devil’s Garden Primitive Loop Trail. It’s an additional loop on top of the regular trail that begins at the Double O Arch. If you hike out to the Dark Angel you’ll see all the same scenery coming back, so by taking this extra loop, you get to see more views and the last arch on the trail, Private Arch. One thing to note if you are taking the Primitive Trail is to start the trail at the Double O Arch rather than taking the trail before you arrive at the Landscape Arch. The trail is going to be a lot easier this way and you’ll avoid some difficult climbing. Only take the Primitive Trail if you are an experienced hiker. Cairns lead the way and in some parts, you need to look around for it because they’re not always 100% visible from the one before.
The Primitive Trail is challenging in both the physical and navigational aspects, so use the buddy system for this one and picking up a trail guide at the trailhead. Cairns mark the entire route of the trail, however, you will encounter forks. On these forks, you’ll find logs in the way of an alternative route. These were put here for a reason, so if you see a log in the middle of the trail, then don’t cross it. That is the wrong way. Light climbing and rock scrambling are scattered throughout this trail so don’t attempt this trail in the rain, snow, or other harsh weather. If you attempt this hike, go in the morning so that you can get out of direct sunlight by noon. If you attempt this hike for sunset, you’re going to be hiking in the harsh heat and you may get lost looking for cairns in the dark, so I don’t recommend making this hike for sunset unless you’re really experienced. It’s one of the most popular hiking trails in the park for all it’s diverse scenery, so don’t miss this one!
DISTANCE | 1-7.9 Miles
DIFFICULTY | Moderate – Strenuous
TYPE OF TRAIL | Loop
ELEVATION GAIN | 1,053 Feet
TRAILHEAD LOCATION | 38.78290234172547, -109.59489792359541
TRAIL GUIDE | LINK
Map of the Best Arches National Park Hikes
MORE HELPFUL GUIDES FOR YOUR TRIP TO ARCHES NATIONAL PARK:
– Packing For A Day Hike: 12 Adventure Essentials To Get You Exploring
– The Ultimate Guide To Camping In Arches National Park
– The BEST Guide To The Delicate Arch Hike In Arches National Park
– A PERFECT 3-Day Itinerary For Arches National Park
– Tower Arch Trail: The Best Hike In Arches National Park
VISITING THE REST OF UTAH’S NATIONAL PARKS? CHECK THESE OUT:
– The ONLY Utah National Parks Road Trip Itinerary You Need
ZION NATIONAL PARK
– How To Conquer The Narrows Hike In Zion National Park (Complete Guide)
– 2 Days In Zion: The Ultimate Zion National Park 2 Day Itinerary
CAPITOL REEF NATIONAL PARK
– How To Spend One EPIC Day In Capitol Reef National Park
– Hiking The Cassidy Arch Trail In Capitol Reef National Park
BRYCE CANYON NATIONAL PARK
– The Ultimate Guide To Camping In Bryce Canyon National Park
– 10 Jaw-Dropping Bryce Canyon National Park Hikes You CANNOT Miss
– One Day In Bryce Canyon: The Perfect 1-Day Itinerary
WHICH OF THESE HIKES IN ARCHES NATIONAL PARK IS ON YOUR BUCKET LIST? SHARE WITH ME IN THE COMMENTS BELOW!

DID YOU FIND THIS LIST OF ARCHES NATIONAL PARK HIKES USEFUL? SAVE IT FOR LATER!