
Last Updated on November 13, 2025
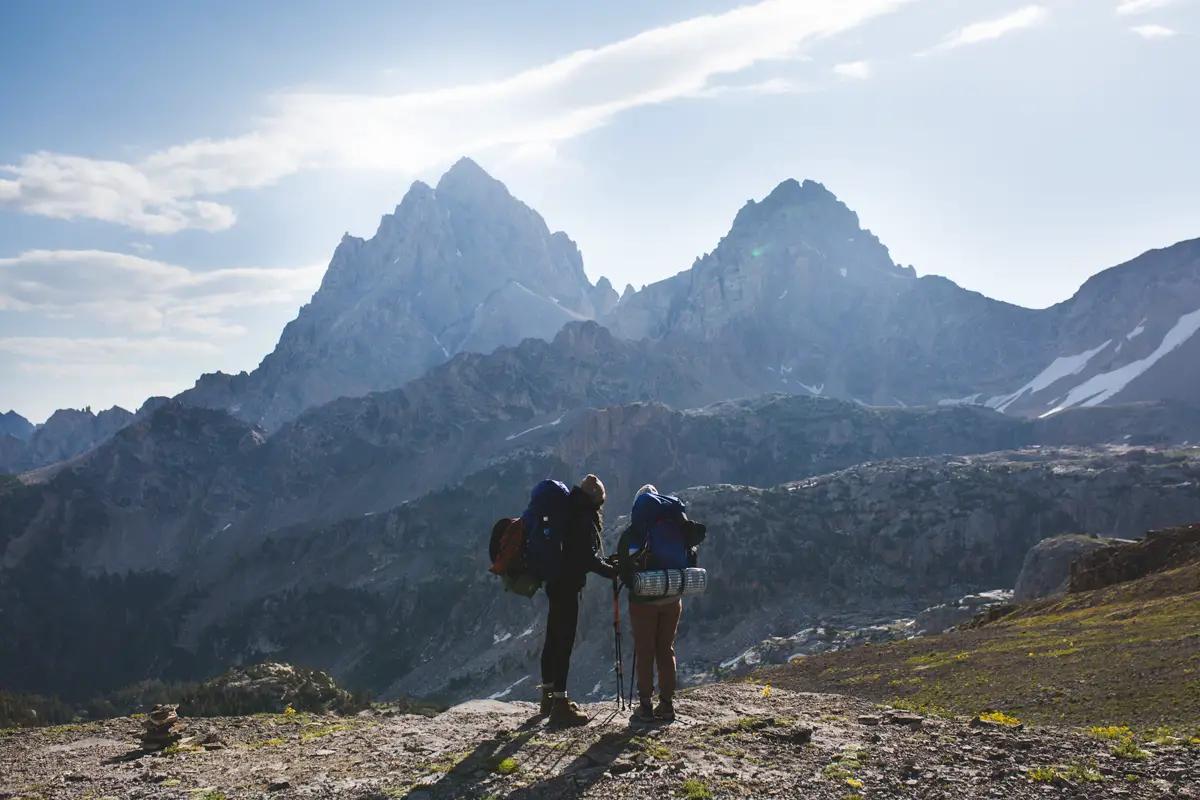
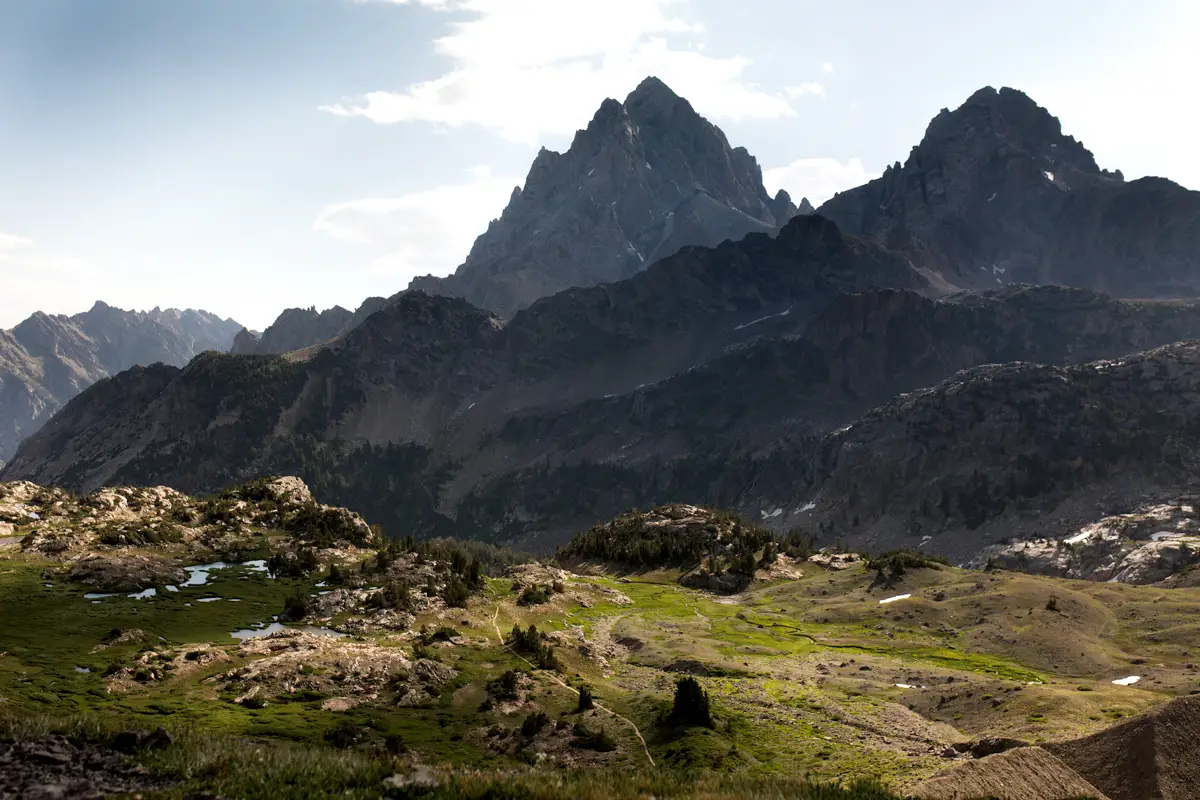
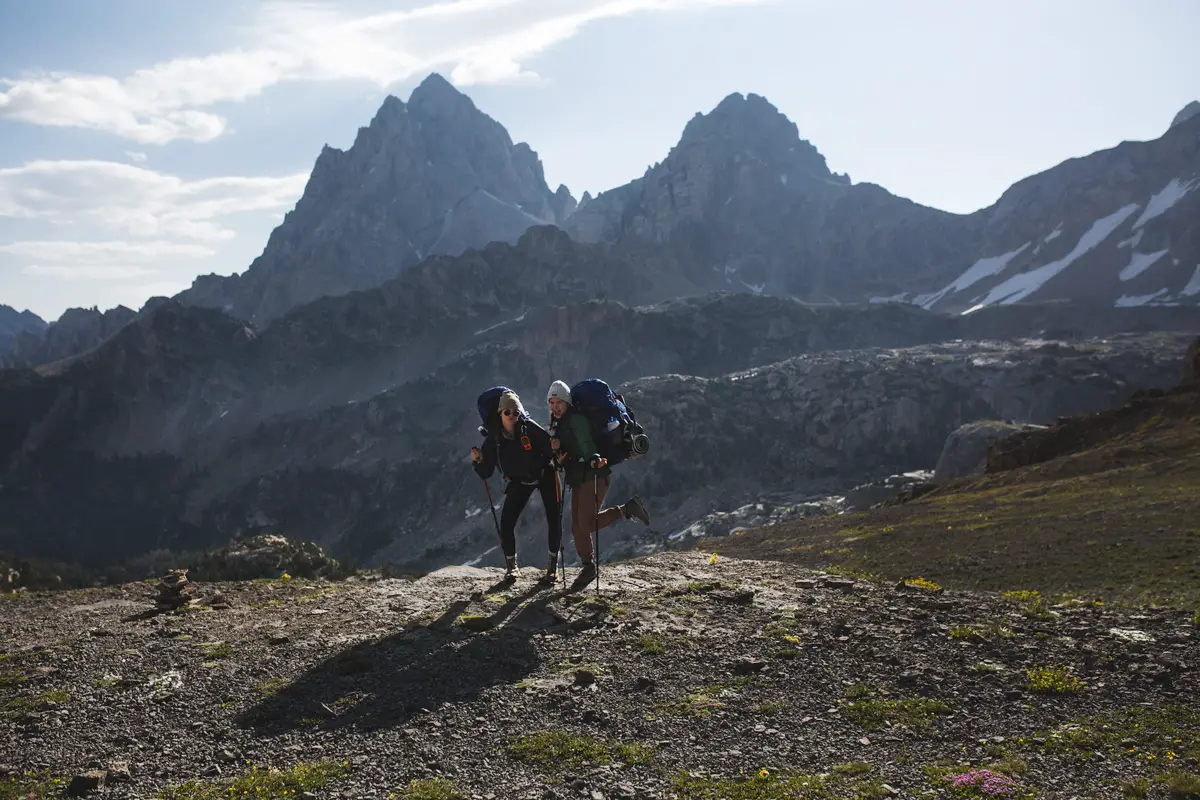
When I stepped on top of Hurricane Pass overlooking the Grand Teton and Middle Teton, I understood why the Teton Crest Trail was named one of North America’s best and most scenic hikes.
When it comes to panoramic views, this hiking trail in Grand Teton National Park has it all: crystal lakes, towering granite peaks, rich pine forests, pocket fields of wildflowers, and an alluring variety of wildlife.
Depending on your route, all 35-45 miles of the Teton Crest Trail traverses Grand Teton National Park, the Jedidiah Smith Wilderness, and two national forests: Bridger-Teton and Caribou Targhee. While millions of hikers will just experience the surface of the Grand Teton Mountains, you’ll be fully immersed in her wild wilderness, away from crowds.
Mile for mile, this backpacking route will keep on delivering and maybe even bring you to tears. Okay, maybe tears are a stretch, but I definitely sobbed my way up to Paintbrush Divide. In the most beautiful of ways, this backpacking trip challenged me mentally, physically, and emotionally.
This is my complete guide on backpacking the Teton Crest Trail.
This post may contain affiliate links for the products I mentioned, but as always, all opinions are my own. I make a small commission, at no extra cost to you, when you make a purchase or booking through these links. This helps to support this space and keep me blogging, which I am so extremely thankful for.
Teton Crest Trail Stats
A brief overview for what you can expect along this multi-day hiking trail:
Type of trail: One Way
Trail difficulty: Strenuous
How long is the Teton Crest Trail? 35-50 miles (route depending)
Total elevation gain: 10,889 feet
Lowest elevation: 6,880 feet
Peak elevation: 10,695 feet
Average elevation: 8,000 feet
Teton Crest Trailheads: Phillips Pass, Granite Canyon, or Aerial Tram (ending at String Lake)
How long does it take to hike the Teton Crest Trail? 3-6 days (route depending)
Teton Crest Trail crowds: When starting from Philips Pass, you’ll likely see few to no other hikers until you enter the park and arrive at Death Canyon. When hiking from Death Canyon to Paintbrush Divide and down Cascade Canyon crowds will gradually increase. As popular as this hike is, it was shockingly quiet for the majority of the trail.
Do you need a permit? Yes
Are there water sources along the Teton Crest Trail? Yes. Water sources are plentiful along the trail from lakes and streams. The streams tend to dry up around late August, but water will always be available from the lakes on the route.

the zesty view over Death Canyon
Teton Crest Trail Permits
Permits are required to hike the Teton Crest Trail. There are a handful of different ways to get them, depending on where you are in the planning process: reservation online if you’re ahead of the curve, or by walk-up at the Jenny Lake Ranger Station or Craig Thomas Discovery & Visitors Center for last-minute hikers.
Online permits
The most ideal way to get permits for the Teton Crest Trail is by reserving them online at recreation.gov. Advanced reservations open at 8:00 am MST on the first Wednesday in January through May 15th. Although most ideal reservations will fill the first day (read: seconds after) they open. It’s extremely competitive and it costs $20 for the permit (non-refundable) and $7 per night, per person for each night on the trail.
Permit cost example: You and a friend hike the trail for 4 nights. $20 (permit) + $28 + $28 = $76.
This cost covers the reservation and the permit needed. When and if you have secured your permits online, you need to pick them up no later than 10:00 am the day before you begin your trip, otherwise they will be released.
When booking online, you want to have a few itineraries in mind because campsites book up FAST. They only reserve 1/3 of the campsites, so the other 2/3 are available for walk-up permits.
Walk-up permits
To get a walk-up permit, the day before you intend you hike, you need to go to the Jenny Lake Ranger Station and wait in line to get a permit. Chances for walk-up permits are quite fair as long as you get there are early as possible.
Confirm the opening time of the ranger station and then plan to get there around 2-3 hours before they open if you’re really serious about getting those permits. My friend and I arrived at the Jenny Lake Ranger Station around 6:30 am, a few hours before they opened, and there were already eight people in line.
My best tip for securing a walk-up permit is to have multiple backup routes/itineraries in mind, just in case you cannot get the permits you want. Have questions prepared for the rangers about the trail: current conditions of Paintbrush Divide, bear activity on the trail, and if they have other recommendations. They are experts on the trail, and you’ll have their full attention when securing your permits.
You’ll also need this information for your walk-up permit: license plate number, car make/model, parking plan, entry point, exit point, and campsite selections.
Can you hike the Teton Crest Trail without permits? Technically yes, but it’s very difficult. If you want to hike the entirety of the trail, beginning at Philips Pass, with no permits, you can camp at Moose Lake, Fox Creek Pass, and Alaska Basin. After Alaska Basin, there are no other free campsites for the rest of the trail. This can be challenging for the last day considering mileage and elevation gain over Paintbrush and Hurricane Passes, so only attempt if you’re experienced and physically fit. Alternatively, you camp at the three sites listed and hike out of Cascade Canyon for a more doable, and safer backpacking trip.
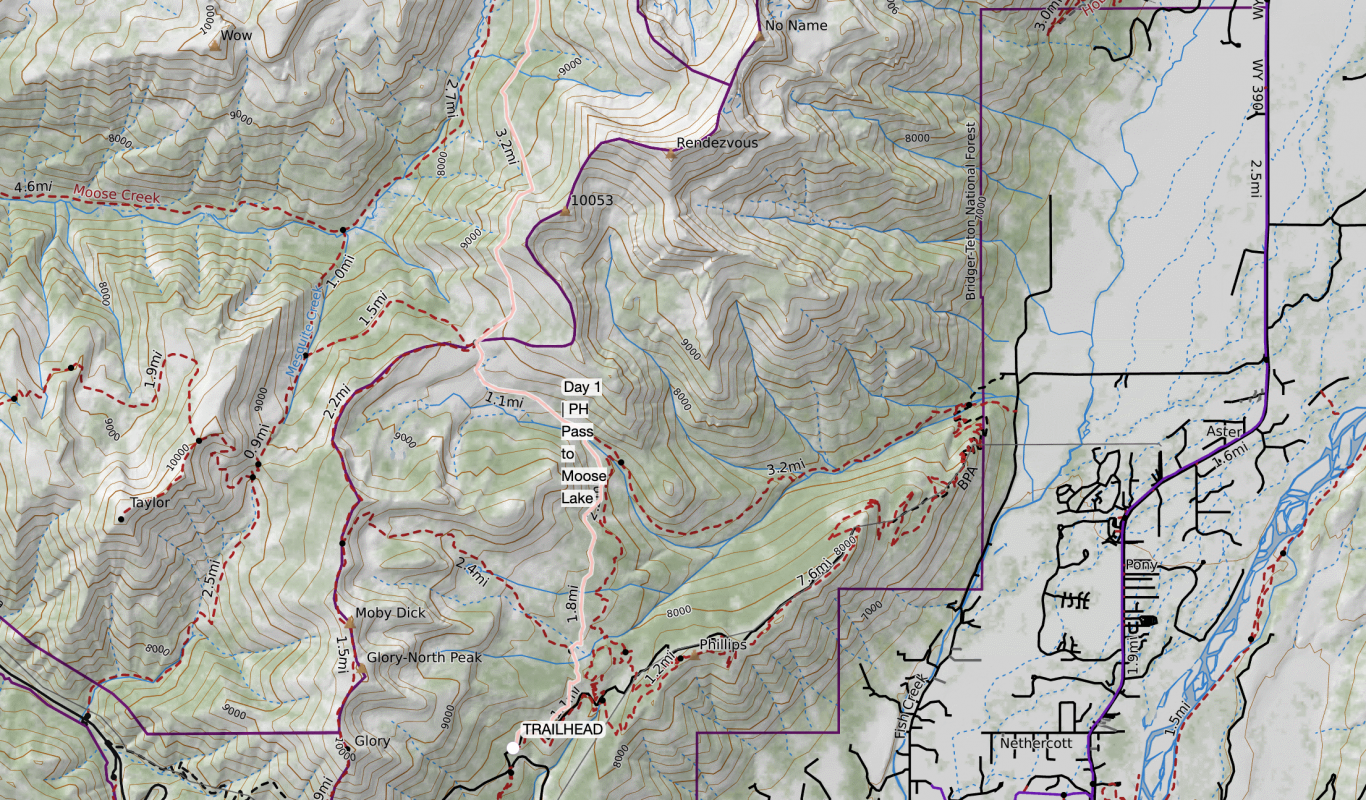
Teton Crest Trail Map & Free GPX File
If you have your own GPS system, you can find the GPS tracks for my Teton Crest Trail map below to put into your navigation system. It starts at Philips Pass and ends at String Lake, and includes detours to Kit Lake, and Static Peak if you want to include that in your itinerary. The trail is well-maintained so you won’t be relying on this 100%, but it was nice to have to point me in the right direction and have a detailed visual of the trail ahead.
Best Time To Hike (When To Go)
The best time to backpack the Teton Crest Trail is mid-July through September. This can vary from season to season, so if you’re hiking in the early or later part of the season, pay close attention to weather reports for snow. One of the biggest factors in planning a TCT backpacking trip is the snowpack since it can linger late in the year.
One of the best tips I have for planning your trip is to keep up with the weather forecasts so that you can plan accordingly if there is surprise snow, storms, rain, closures, etc..
The snowpack varies year to year, but generally, the snow is melted in elevations below 6,700 feet by mid-June. For the higher elevations along the trail, the snow slowly melts progressively into mid-July. If you’re planning to complete this backpacking trip with snow at higher elevations, you may need an ice ax and microspikes, and know how to use them, to safely cross Paintbrush Divide, and Hurricane and Fox Creek Passes.
At higher elevations, snow can linger as late as August, so keep updated on the weather reports and you’ll be able to make the call closer to the day you begin the trail. Contacting the Grand Teton National Park Service is another great resource for first-hand advice and expertise on the current trail and pass conditions.
This Facebook group and these online reports helped me stay the most informed since there were updates almost daily with photos and personal experiences on the trail, plus some great tips for traveling around Grand Teton National Park.
When planning, I would shoot for the beginning to mid-August if you want great weather, wildflowers, and to (have a good shot to) avoid snow.
Getting To The Teton Crest Trailhead
There are many different ways to get to the trailhead.
Trailhead Options
Aerial Tram at Teton Village (Google Maps): If you only have a few days to hike the Teton Crest Trail, taking the aerial tram to Rendezvous Peak is a great way to get a head start and pack a lot into just a few days. It’s a 9-minute ride to the summit and costs around $60. Buy tickets online in advance here.
Granite Canyon Trailhead (Google Maps): Granite Canyon is the most popular trailhead to hike the Teton Crest Trail.
Philips Pass Trailhead (Google Maps): Hiking purists would consider this the “official” start of the Teton Crest Trail.
Trailhead Parking Logistics
Whenever you get your permits from the Jenny Lake Ranger Station, they will give you a list of local taxi/ride options.
Because this trail is a point-to-point hike, you’ll need to use one of the options to get back to your car. There are a few ways you can go about this depending on your situation:
Option 1: Park your car at the end (String Lake Trailhead) and have another car take you to the trailhead (local taxi, Uber, shuttle, etc.) Check prices with Teton Mountain Taxi for a reliable ride.
Option 2: If you’re hiking with a group and have two vehicles, park one at String Lake, take the other to the trailhead, then go and pick up the car at the trailhead once you’re finished.
Option 3: Hitchhike to/from the trailhead. This is the least reliable, and it can also be unsafe, so it really depends on your comfort level. I’ve heard it’s easy for those who do it, but as a woman, I’d rather spend the money to have a ride planned.
The most affordable option is going to be hitchhiking or using multiple cars. Getting a shuttle/taxi can cost up to $80 or more.

camping at Kit + Snowdrift Lakes
Teton Crest Trail Campsites & Camping Information
The campsites on the Teton Crest Trail are plentiful ,which makes planning any length of a backpacking trip on this trail very seamless, especially if you weren’t able to reserve your ideal permits and have to grab walk-ups once you arrive.
Once you have your permits, the individual sites run on a first-come first-served basis within the camping zones with hiking groups of six or fewer. Groups larger than six have to use designated group campsites specifically assigned to them by the rangers.
The Teton Crest Trail also has a few alternative camping spots, located outside the park boundaries, that you can camp at without a permit: Alaska Basin and Fox Creek Pass. Many backpackers choose these options because they either couldn’t get the permits they wanted or they are trying to complete the trail without permits.
Both of these areas are owned by the US Forest Service, so you can camp anywhere in these areas as long as you’re outside the park boundaries. Boundaries are clearly established with signs, so staying within them is easy. When choosing a backcountry camping spot, use sites that have already been established and make sure you’re 200 feet away from water sources.
North Fork Cascade Canyon
South Fork Cascade Canyon
Death Canyon
Garnet Canyon
Granite + Open Canyon
Holly Lake
Lower Paintbrush
Marion Lake
Phelps Lake
Upper Paintbrush
Surprise Lake
Alaska Basin (No permit required)
Fox Creek Pass (No permit required)
When choosing your campsites, keep the number of days you’re hiking, physical capabilities, and elevation changes in mind so that you do not end up exhausting yourself.
Some good rules of thumb to keep in mind, courtesy of the NPS, are to expect to hike at about 2 miles per hour, adding one hour for every 1000 feet of elevation gain, and to not cross more than one pass per day.
Another rule of thumb that I like to use is to cap my daily mileage at around 8-9 miles every day. With these tips in mind and a variety of camping options, crafting an ideal Teton Crest Trail itinerary is no biggie.
The BEST campsites on the Teton Crest Trail are Death Canyon Shelf, Marion Lake, North Fork Cascade Canyon, Alaska Basin, Holly Lake, and Kit Lake.
These offer the best views and, therefore, will be the first to go for permits (besides Alaska Basin and Kit Lake).
Kit Lake is a pretty unknown spot to camp on this trail, but the location is just after Hurricane Pass on the map, behind the South and Middle Teton.
You don’t need to do anything special to stay here, just let the person at the permit office know when you’re securing your other permits (they will know what you’re talking about). Once you arrive, please follow the 7 Leave No Trace Principles to keep this lesser-known campsite nice for the next backpackers. Please, don’t ruin it for the rest of us!
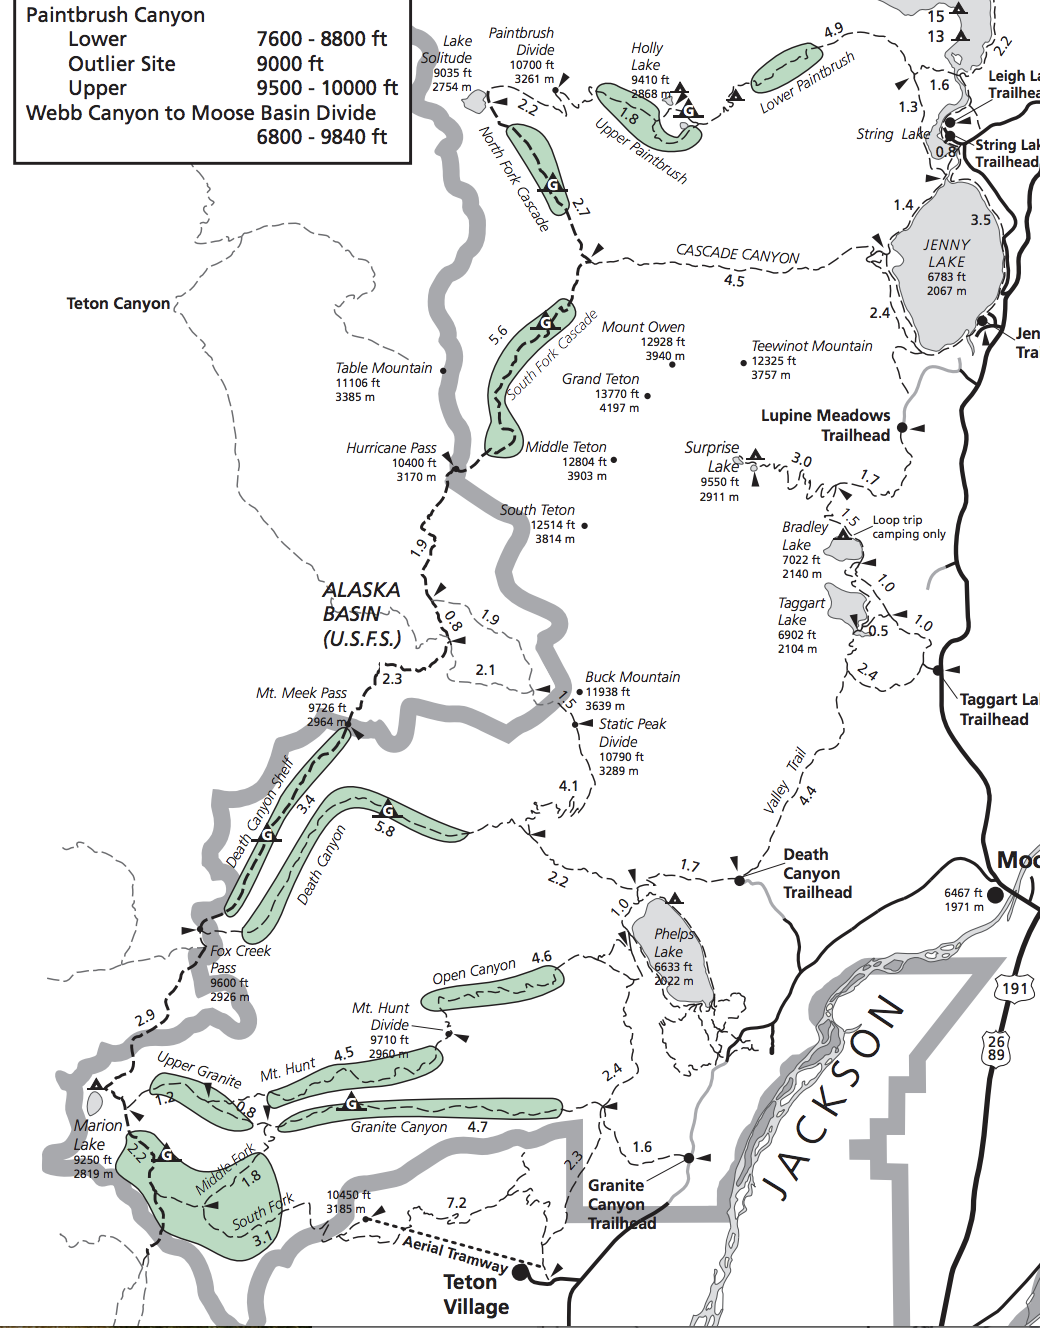
Pictured below is a better visual guide to all the campsites on the Teton Crest Trail, as well as mileage and elevation changes. There is a more in-depth PDF I recommend downloading here with the same information below, as well as some camping regulations, things to know, safety, etc. I had a photo of it saved onto my phone throughout my trip and it ended up being very helpful when looking for a general overview of the day ahead.
Teton Crest Trail Itinerary Options
Most backpackers complete the Teton Crest Trail in 4-6 days. Keep in mind the most common route is the four-night option beginning at Granite Canyon, so those permits will be the first to go. My friend and I went with the 5-night/6-day option, and we enjoyed having an extra day out there.
Luckily, there is a ton of flexibility when planning this backpacking trip due to the variety of camping options. Here are some great itinerary options:
Three Night Itinerary
Trailhead | Aerial Tram at Teton Village
Camp 1 | Death Canyon Shelf / Fox Creek Pass
Camp 2 | South Fork Cascade Canyon
Camp 3 | Upper Paintbrush / Holly Lake
Four Night Itinerary
Trailhead | Granite Canyon
Camp 1 | Granite Canyon / Upper Granite Canyon / Marion Lake
Camp 2 | Death Canyon Shelf / Alaska Basin
Camp 3 | South Fork Cascade Canyon
Camp 4 | Upper Paintbrush / Holly Lake
Five Night Itinerary
Trailhead | Philips Pass
Camp 1 | Moose Lake
Camp 2 | Fox Creek Pass / Death Canyon Shelf
Camp 3 | Alaska Basin
Camp 4 | Kit + Snowdrift Lakes
*Or you can opt to spend another night in Alaska Basin and summit Static Peak Divide
Camp 5 | North Fork Cascade Canyon / Upper Paintbrush / Holly Lake
Challenges of Hiking the Teton Crest Trail
Before you leave and while you’re out, here are some things you’ll want to know about for your backpacking trip.
Wildlife
There is a variety of wildlife in Grand Teton National Park: black and grizzly bears, moose, mule deer, bighorn sheep, porcupines, marmots, and pika. You’ll want to be the most alert for bears and moose.
Throughout the entirety of your hike, you want to remain bear-aware and practice preventing encounters by keeping all of your food and scented items in your approved bear canister, packing out everything you pack in, carrying bear spray, and clap or shout every so often while hiking to let any wildlife know where you are.
The Grand Teton National Park Service has an informative page on Safety in Bear Country that you can browse for all things bear safety. Read and review everything so that you can stay as safe as possible in the backcountry.
Bugs
Bugs, while not a “hazard”, can be extremely annoying while you’re hiking. They’re the largest issue when hiking in lower elevations in the Tetons, and they will turn your entire body into a buffet if you don’t pack any bug repellant. Even when I was wearing long sleeves, they were able to bite through my clothing, so make sure you bring bug repellant and consider treating all your clothes with permethrin spray.
Exposure
One of the largest concerns when hiking the Teton Crest is crossing over Paintbrush Divide. Trekking poles were the biggest game-changer here since they gave me an extra sense of security and stability. Coming from Cascade Canyon is a lot easier than coming from the other way, so as long as you take it slow and keep your eye on the trail, you’ll get over fine. If snow is still on the divide, you should keep your experience in mind, and only cross if you know how to use an ice ax and microspikes.
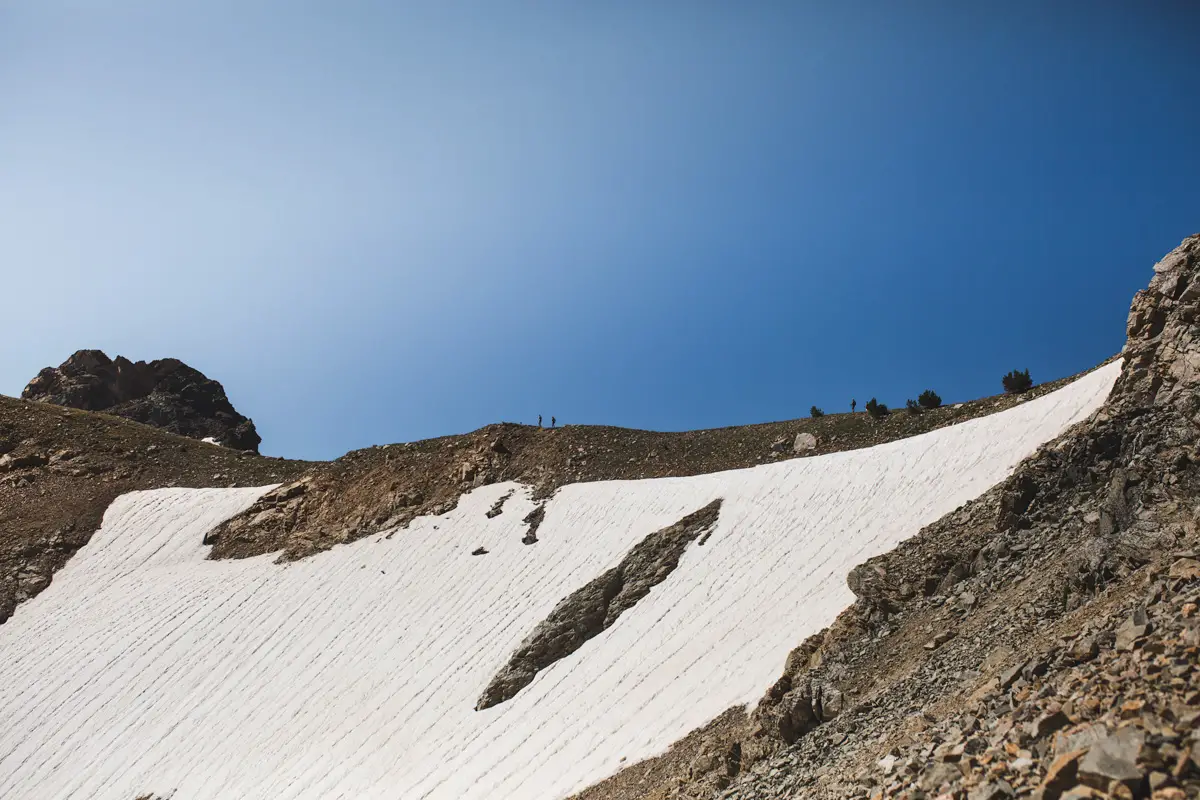
the view of the top of Paintbrush Divide
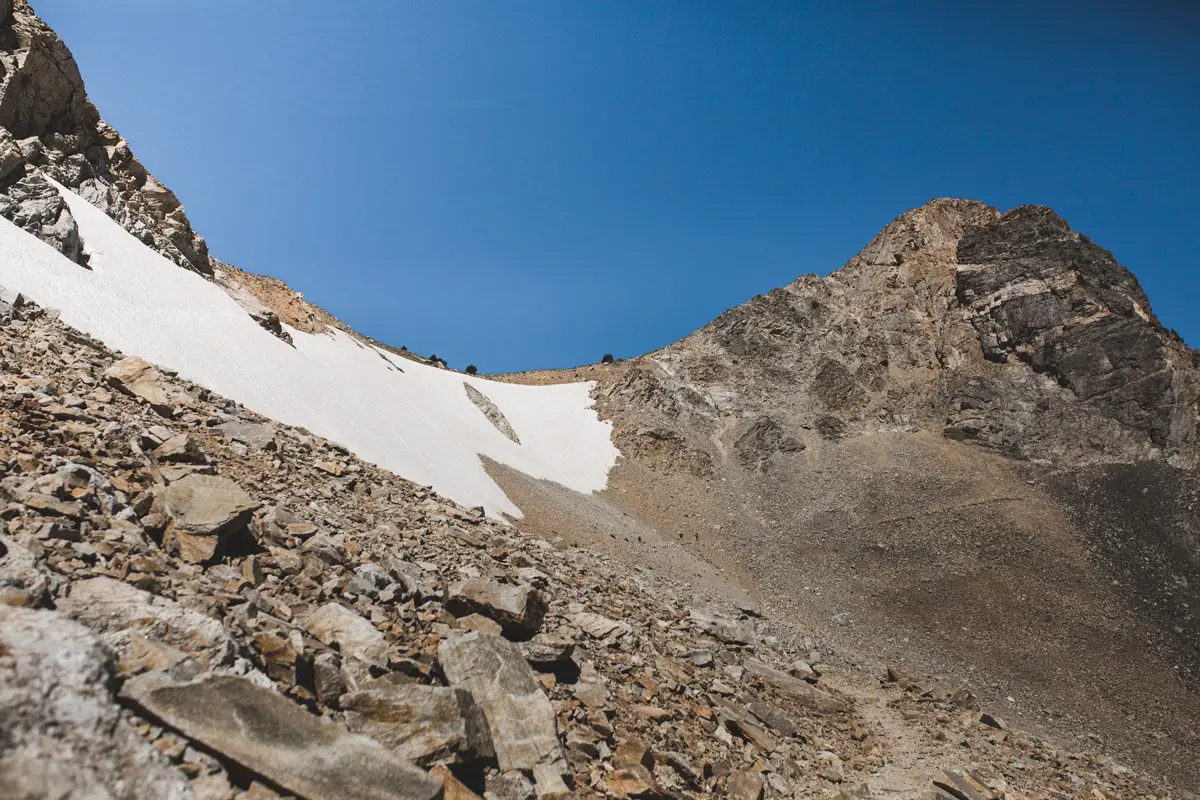
getting across Paintbrush (trail pictured in the middle)
Thunder + Lightning
You’ll rarely be hiking below 8-9,000 feet, so in the event of a thunderstorm or lightning, you want to make sure you know the proper protocol so that you can stay safe. There is a great, short informational video here to get you started on thunderstorm safety while backpacking.
What To Pack
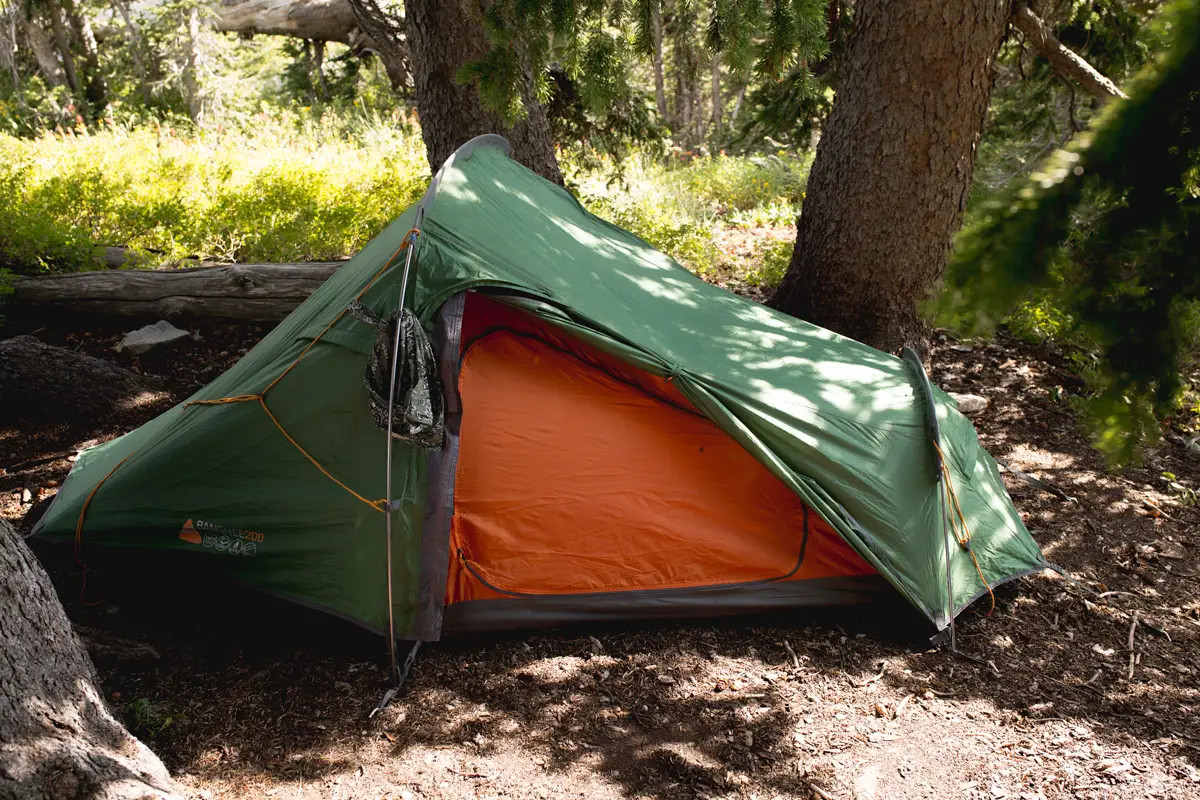
Tent: My Big Agnes Copper Spur is my GO-TO backpacking tent. It’s extremely lightweight and so durable that it made it through a wicked monsoon in Big Bend in one solid piece. Nuff said. The REI Co-Op Half Dome Tent is a good alternative and will save you a few Benjamins.
Backpack: I used the Osprey Eja 58 L on this backpacking trip, which was a mistake since a bear can take up about 3/4 of the space in this pack. Shoot for a minimum of 60 liters. I recommend the Osprey Ariel AG 65 L (mens/womens) or the REI Co-Op Traverse 60 L (mens/womens)so you have enough space for everything.
Sleeping Bag: I recommend the REI Magma 15, or any bag rated from 10-15 degrees.
If you don’t want to buy a new bag and yours isn’t rated low enough, you can pick up a sleeping bag liner to bring down the temperature rating of your sleeping bag.
Sleeping Pad: My tried and true sleeping pad is my Therm-a-Rest XTherm. I bought this sleeping pad since it is lightweight (15oz) and because I need something a bit more supportive for my hips. If you don’t need something that hefty, the Therm-a-Rest XLite is another good option.
Trekking Poles: These are a personal preference. They give me extra stability and protect my knees, so I like to bring my Black Diamond Trail Ergo Cork Poles (linked similar).
Cooking System, Fuel, + Fire Source: Campfires are prohibited on the entire Teton Crest Trail, so a cooking system is necessary for the trip.
My Jet Boil MiniMo has been my trusted companion on all my hiking and camping trips. If you’re in the market for a new stove, I recommend the newer, and lighter, JetBoil Stash. You can pick up fuel locally in Jackson Hole before your trip or at one of the markets in Teton Village.
Don’t forget a lighter and matches, and waterproof matches in case of an emergency.
I’m normally not passionate about utensils, but the GSI Outdoors Essential Spoon proved to be one of my favorite purchases EVER for backpacking. It has a long handle so you won’t get your hands dirty while you eat, and you’ll be able to get those last bits of drool-worthy penne out of the bottom of your dehydrated meal bag.
Coffee Mug: No morning in the backcountry would be complete without the GSI Outdoors Infinity Mug and the best instant coffee.
Water Purification / Hydration Bladder: A Sawyer Squeeze Water Filter is the best affordable water purification system. I love it because it’s lightweight and filters water as you drink. I also brought along Katadyn Purification Tablets for redundancy in case my main filter gives out.
For this trip, I also carried a 2.5L Osprey Hydration Reservoir. With these 2.5 liters, plus the two, 1L Sawyer Squeeze pouches, you’ll have 4.5 liters to get you to your next refill. Trust me, this is the most ELITE water setup.
Bear Spray: You can pick up a can of bear spray in Jackson Hole or at one of the convenience stores in Teton Village before you head out. A can of this is necessary for your own safety if you have a bad encounter with a bear, just make sure you know how to use it and practice before you head out.
Bear Canister: Bear cans are a required item on the Teton Crest Trail for your safety and the trail’s wildlife. I bought the Garcia Bear-Resistant Container since it’s the lightest and cheapest option. The other option is made by the brand Bear Vault in a few sizing options, but the BV450 and BV500 are the most common. I don’t think many people have a preference, but I know the Garcia is more durable and approved for use in Alaska.
Headlamp: There isn’t a single hike that I’ll go on without my Petzl Tactikka (linked similar).
Clothing: These are some of my current favorite pieces of gear that have elevated my adventures in the backcountry
1 Rain shell | Arc’teryx Beta Jacket (mens/womens)
1 Rain pants | REI Trailmade Rain Pants (mens/womens)
1 Down jacket | I love my Fjallraven Greenland Down Jacket, but they no longer make it. Most hikers swear by the Patagonia nano-puff (mens/womens).
1 Hiking pants | Kawa Club (unisex)
1-2 Hiking shorts | Patagonia Baggies (mens/womens)
2-3 Hiking tops | short and longsleeve
5-6 Underwear | Anything that isn’t cotton.
3 Socks | Falke Trekking Socks is the only correct answer
1 Pj | Midweight baselayers, thick wool socks
1 Sun hat | Ball cap or sun hat
1 Beanie and gloves | Patagonia Fisherman’s Beanie
1 Sandal | To wear around camp and at lakes
1 Hiking shoes | My La Sportiva Prodigio trail shoes are the comfiest hiking shoes I’ve ever owned
Swimsuit | Whatever is the best option for alpine lake jumps.
Pocket Knife: Quite possibly my favorite item that I brought on the Teton Crest Trail was my Trango Piranha Knife. It’s compact in size and it came in handy a few times. I also used it to open and close my bear can.
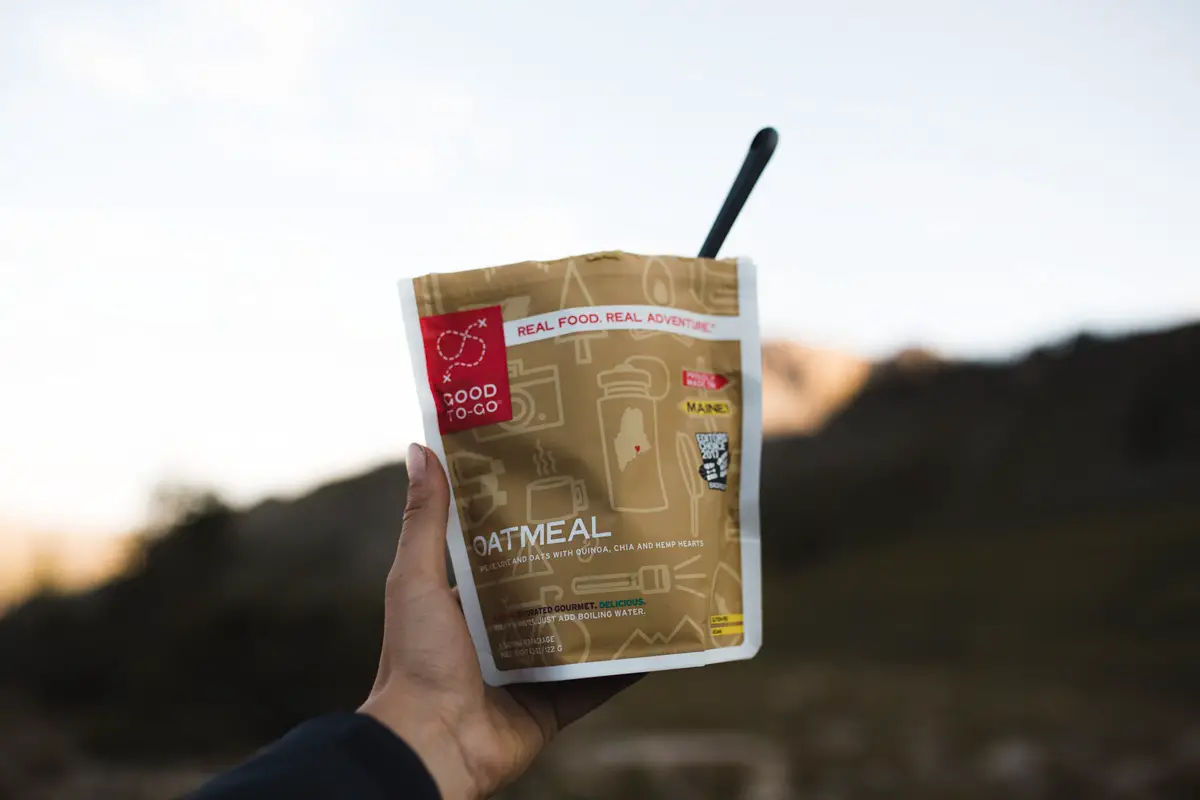
Good-to-Go makes some of my favorite backpacking meals
Food: Some quality grub is going to make or break your backpacking experience. Since you’ll have to store all your food and smelly items in your bear can, you want to choose foods that are calorically dense to save space.
Navigation: You should always have multiple forms of GPS with you while you’re backpacking. A basic map and compass are non-negotiables. I bought this waterproof topographic map for the trail, and it made planning and reviewing the route so much easier. The regular park map doesn’t have the full trail details, especially if you’re starting at Philips Pass, so I highly recommend it.
I always bring my Garmin InReach Explorer+ (linked the mini). This device allows me to communicate off-grid using satellites, check weather forecasts, send messages to loved ones, keep a GPX file of the trail, and much more that helps me feel more secure in the backcountry. If you are looking to buy one, I recommend buying a used one to save a ton of money.
And just because I like redundancy, I’ll also have a map on the Gaia GPS App. You can track your offline location and enjoy a ton of other nice features for only $40/year.
First Aid Kit: The Adventure Medical Ultralight Medical Kit 0.7 is my go-to for first aid. I love that you can order refills for this to keep everything uniform and compact as well. It supplies everything you need for a few days in the backcountry and weighs next to nothing! I will recommend packing a few extra band-aids in here before you head out since this doesn’t give you too many.
Sun Protection: Even if it isn’t unbearably hot, the sun can still have harsh effects on your skin at higher elevations. I thought I put my sunscreen everywhere and accidentally forgot my hands… Let’s just say they got toasted, but all my other extremities were protected with my favorite sunscreen. Chapsticks with SPF, sunglasses, and long sleeves (just in case I get too burnt) are also necessary parts of my backpacking checklist for sun protection.
Permits / ID / Cash: These are all necessary for your journey. You may be stopped by a ranger and they will ask for your permit and proof of I.D. Neither my friend nor I was stopped by a ranger during our hike.
Toilet Paper, Sanitation Trowel, + Pee Cloth: While in the backcountry, you MUST pack out all of your toilet paper, and bury all food and human waste in a cathole that is at least 6-8 inches deep. These are the items you’ll want for having successful, mess-free movements outside: Kula Cloth (A MUST FOR MY GALS), trowel, and toilet paper. All my toilet paper goes in a gallon-size Ziploc, sealed, and then all the bathroom items I put in the bag that came with my sawyer squeeze.
Microfiber Travel Towel: On all my adventures, I always take my REI Co-Op Multi Lite Towel. This towel is extremely light, quick-drying, and compact, making it perfect for backpacking and hiking. The extra-large size is perfect for wrapping yourself up in a full-size towel, and it only weighs eight ounces!
Wet Wipes: Don’t waste your time trying to clean yourself up with those dinky traditional wet wipes and get yourself some Epic Wipes. These are the best for backpacking because you only need one of these wipes to feel fresh and clean. One wipe can clean your entire body!
Hand Sanitizer: You’ll want to have hand sanitizer for clean hands after using the bathroom, before you grab your favorite snack, and before you begin cooking all of your meals.
Bug Repellant: At higher elevations, bugs aren’t really an issue, but you’ll definitely encounter them in lower elevations. I like to bring a small bottle in my pack and reapply frequently so I don’t turn into an all-you-can-eat buffet.
Camera: For this trip, I brought a 35mm lens (although I recommend something wider like 15-35 mm), my Canon DSLR, spare batteries, and an extra memory card.
Book, Card Games, + Downloadables: I prefer to get to camp early so I am not eating/cleaning up in the dark, which gives a good bit of time between setting up camp and hitting the hay for the night. Before I set out, I download some new books on Audible to listen to or pack a deck of cards. ‘Jitterbug Perfume’ is my favorite book if you’re looking for an exciting fiction listen. Otherwise, download the episodes of that show you’re binge-watching!
Portable Power Bank: If you’re using your phone to take photos or track your location, a portable battery will be important to stay online. You won’t have any service though, so put your phone on airplane mode to help save battery.
If you have any questions about hiking the Teton Crest Trail, please feel free to message me on Instagram if you need more advice. Otherwise, browse my other Wyoming guides to help you plan your trip:

Did you find this guide to the Teton Crest Trail useful? Save it for later on Pinterest!

Where is the turn of the Kit lakes from Tenton crest trail??
Hi! Once you go over Hurricane Pass, it’s right around where the South Fork Cascade Canyon camping zone begins. There should be a small sign with the option of going two ways. You’ll make a right onto the Avalanche Divide Trail, and you may have to look around for the trail once you cross the small stream. After that, the trail is very obvious. I recommend mapping it up on caltopo.com to keep you on the right track. Once you get up to the divide, you’ll see Kit and Snowdrift Lakes in front of you and it’s a small walk down from the top of the divide. If you have any more questions/concerns, message me on Instagram (@aarenprody) and I can help you out (:
Hi, Thank you for this detailed guide!
I am planning a hike on this trail in September; I find your info super helpful.
A question: which paper map did you use? the link above to the waterproof topo map used, takes me to the compass page; I’d love to know which map you’ve used.
Regards,
Inbar O.
Hi Inbar!
I bought a National Geographic Topo Map for Grand Teton National Park off amazon (: I updated the link for you! Hope this helps and good luck!
Best,
Aaren
Technically bear cans/canisters are not required. What is required is an IGBC certified bear proof food storage. This could be a bear canister, but it could also be an Ursack, which is not a hard sided canister.
Hi Wes,
Thank you for this comment. The reason why I recommended a bear canister is because it is preferred, and sometimes required in certain areas in the bear country. Bear bags can be hung improperly, or it’s hard to find trees suitable, so most backpackers go with a bear canister. I know what I feel keeps me the safest when I am among wildlife, so I recommended what I feel is the best. However, I will update this to reflect your comment.
Thanks,
Aaren